Red nail designs have a way of making a manicure look instantly more polished. Whether you prefer a deep wine shade, bright cherry red, or something soft and sheer, there is a red nail design for almost every style.
Red has also been having a major moment on social media. You may have come across the popular “Red Nail Theory,” which suggests that red nails can make your hands look more noticeable and give your overall look a confident, feminine feel. You do not have to believe the theory to enjoy the trend, though. Red simply works.
And you do not always need a salon appointment to get a beautiful manicure. Many of the latest red nail designs are surprisingly simple to recreate at home with a few basic tools.
From classic glossy red nails to French tips, velvet finishes, glitter, animal print, and aura nails, here are 15 red nail designs worth trying.
1. Classic Ruby Red Nails
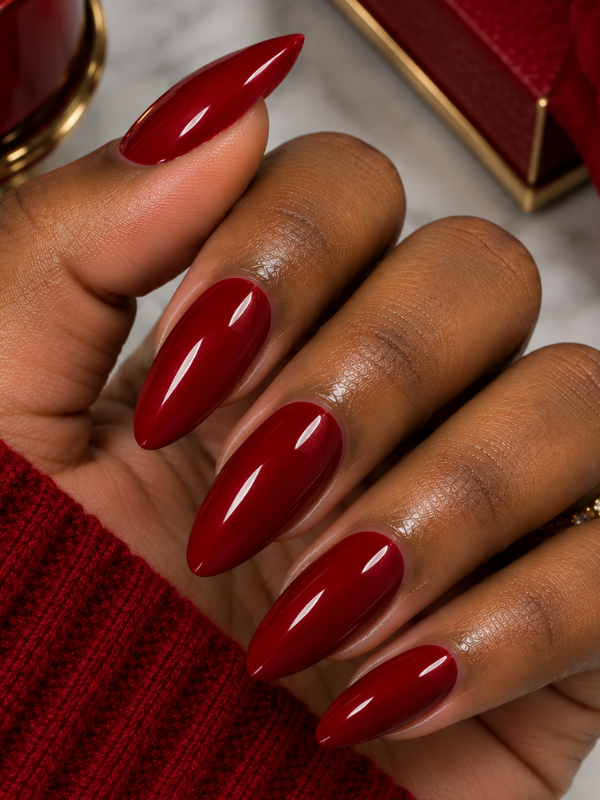
Sometimes, a simple red manicure is all you need.
Classic ruby red nails look especially beautiful when the polish is smooth, glossy, and evenly applied. The trick is not to rush the application. Thin layers usually give you a cleaner finish than one thick coat.
How to Create the Look
Start with a base coat to protect your natural nails. Apply one thin layer of ruby red polish and allow it to dry. Follow with a second thin coat for a richer color.
Finish with a glossy topcoat to give your nails that shiny, freshly-done appearance.
Tip: If you get polish around your cuticles, use a small flat brush dipped in acetone to clean the edges before applying your topcoat.
2. Balletcore Red Nails
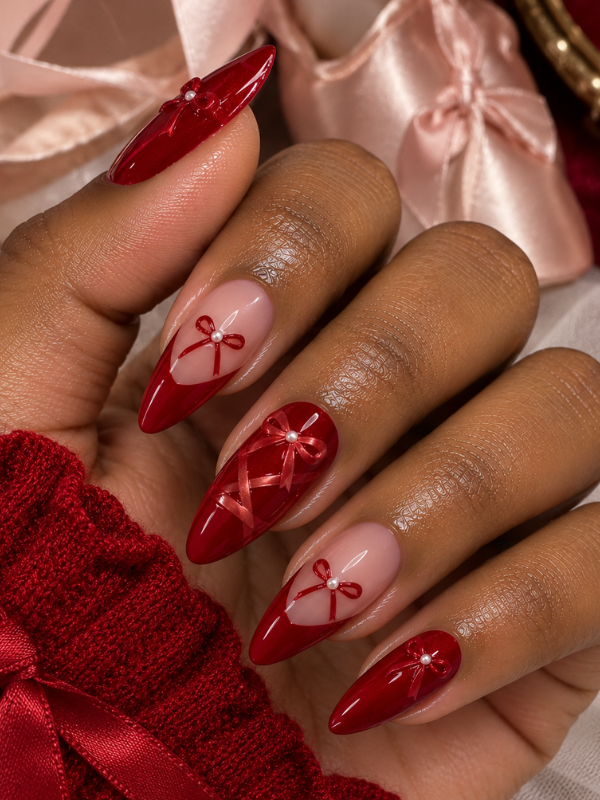
If you love soft, feminine nail looks, this version of red is worth trying.
Instead of using an opaque red polish, choose a sheer or jelly red. The finished manicure should allow some of your natural nail to show through.
The result is delicate and almost looks like a rosy tint on your nails rather than a heavy coat of polish.
How to Create the Look
Apply a clear or sheer base coat first. Then add one thin layer of jelly red polish.
If you want slightly more color, add another very thin coat. Keep the finish light and translucent rather than completely opaque.
This style works particularly well with short or medium-length nails.
3. Velvet Red Nail Designs
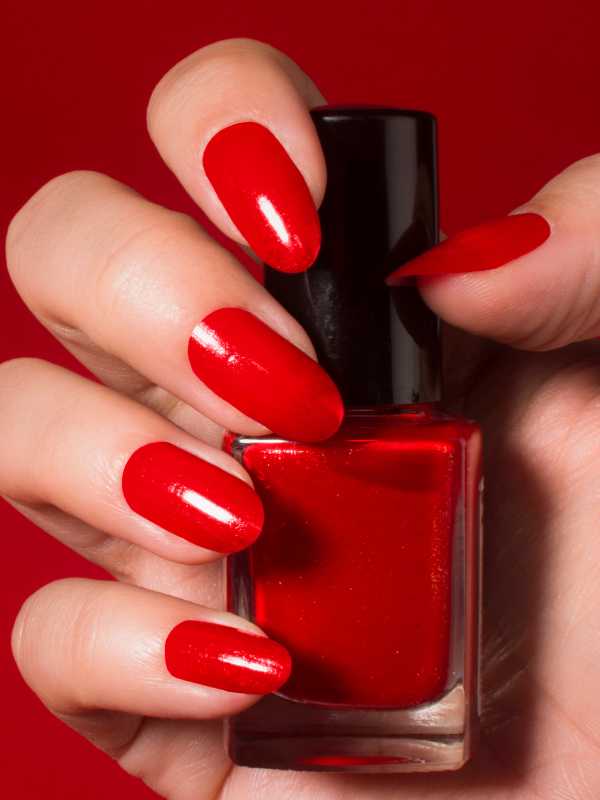
Velvet nails are all about the way the polish catches the light.
The manicure has a soft, reflective appearance that changes as you move your hands. Red velvet nails are especially striking because the deep color makes the metallic effect stand out.
How to Create the Look
You will need a red magnetic polish and the magnet that comes with it.
Apply a layer of the magnetic polish to your nail. Before it dries or cures, depending on the type of polish you are using, hold the magnet close to the nail for about 15 to 30 seconds.
Move the magnet slightly to create the reflective velvet effect you want.
If you are using gel polish, cure the nail according to the product instructions after creating the effect.
4. Minimalist Red French Tip Nails
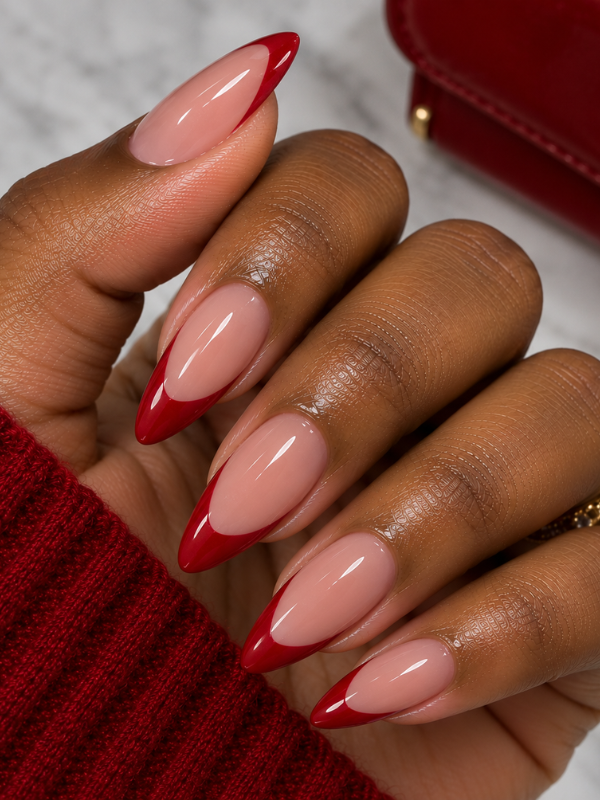
French tips do not have to be white.
Replacing the traditional white tip with bright red gives the manicure a modern and slightly playful finish while keeping it elegant.
How to Create the Look
Begin with a nude, pink, or clear base.
Place French tip stickers across your nails, leaving the tips exposed. Apply red polish to the exposed section.
Carefully remove the sticker while the polish is still slightly wet. Allow the tips to dry before applying your topcoat.
If you have a steady hand, you can skip the stickers and paint the tips freehand using a thin nail-art brush.
5. Red Negative-Space Dot Nails
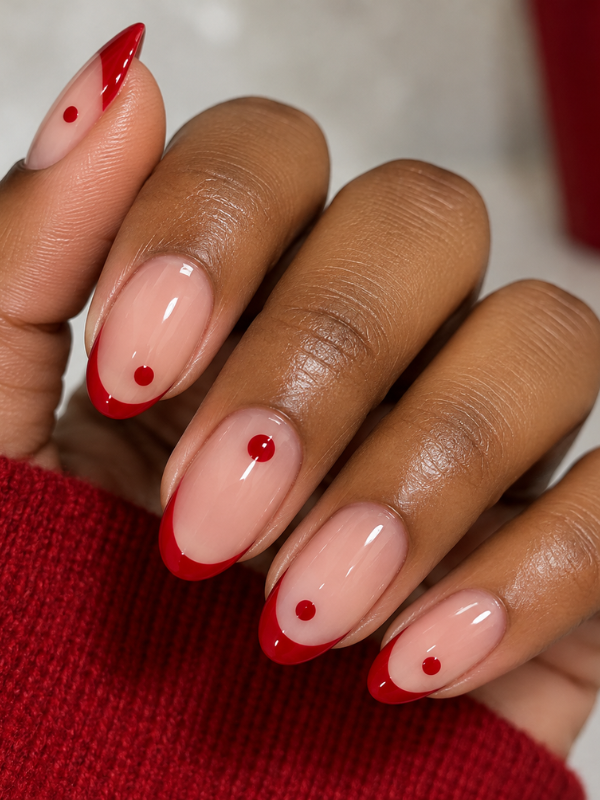
Want something simple but different?
A single red dot can completely change a basic manicure. This design uses plenty of empty space, making it perfect if you prefer minimalist nail art.
How to Create the Look
Apply a clear or nude base coat and allow it to dry.
Dip a dotting tool into red polish. Gently press it onto the nail to create a clean circle.
You can place the dot in the center of the nail, close to the cuticle, or slightly off to one side.
For an even more interesting manicure, place the dot in a different position on each nail.
6. Red and Gold Foil Accent Nails
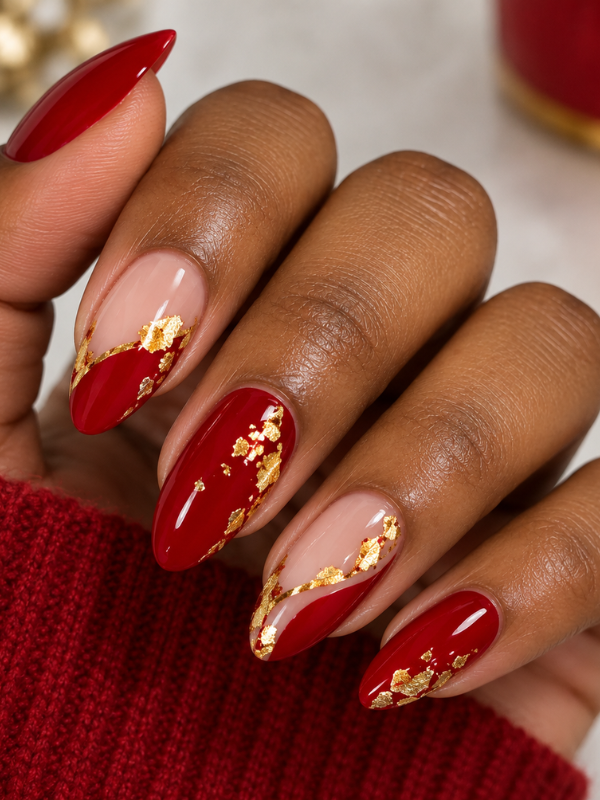
Red and gold are a beautiful combination. Adding small pieces of gold foil can make an otherwise simple red manicure feel much more luxurious.
You do not need to cover every nail with foil. Using it on one or two accent nails can be enough.
How to Create the Look
Paint your nails red and choose one or two nails for the gold accent.
While the final coat is still slightly tacky, use tweezers or a silicone tool to place small pieces of gold foil onto the nail.
Do not worry about making the pieces perfectly even. Randomly placed foil can actually make the design look more interesting.
Finish with a generous layer of topcoat to keep the foil in place.
7. Two-Tone Ombre Red Nail Design
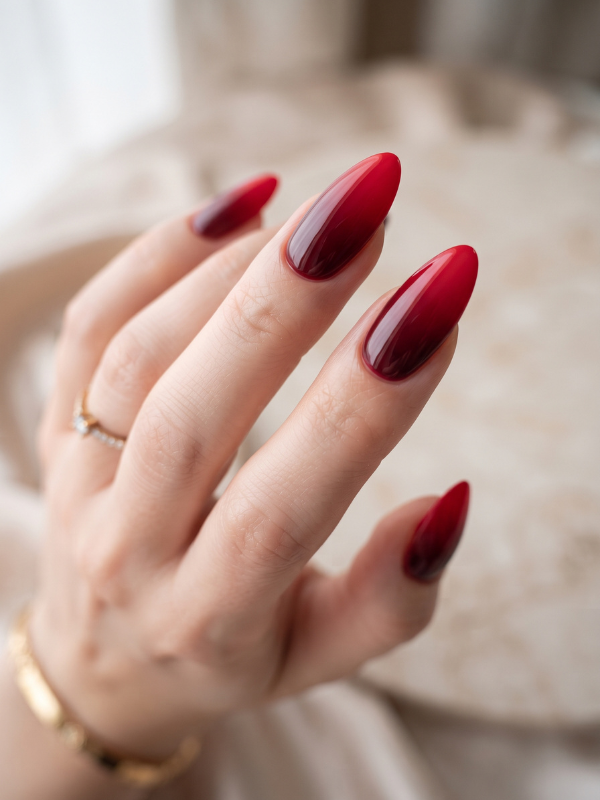
Ombre nails can look complicated, but a makeup sponge makes the blending process much easier.
For this design, combine a darker red with a brighter shade to create a soft color transition.
How to Create the Look
Start with a deep red base and allow it to dry.
On a small makeup sponge, paint stripes of your dark red and lighter red polish next to each other.
Gently press the sponge onto your nail. Repeat the process until the colors blend smoothly.
Clean any polish that gets onto your skin and finish with a glossy topcoat.
8. Holly Berry Glazed Red Nail Design
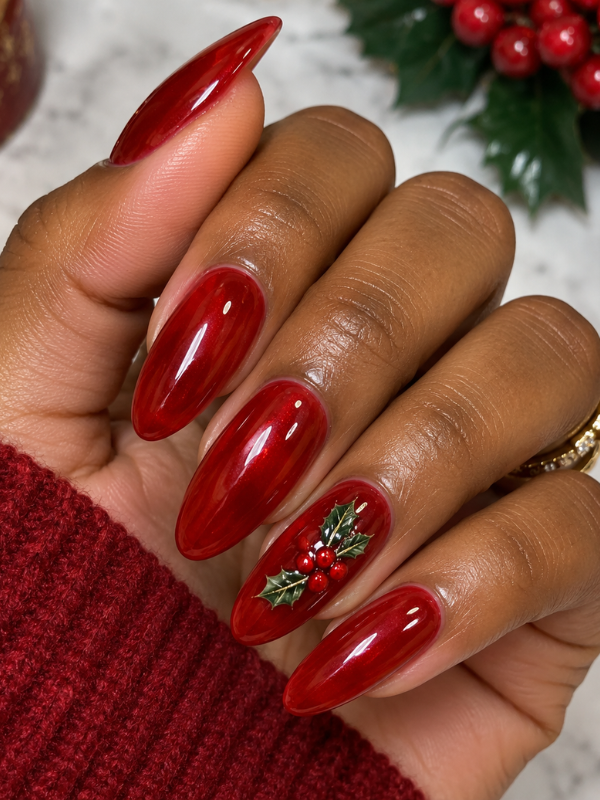
If you love glossy, reflective manicures, try adding a glazed finish to a rich red base.
This design gives traditional red nails a more dimensional appearance and works particularly well during the holiday season.
How to Create the Look
Apply an opaque red polish and allow it to dry completely.
Once the polish is ready, apply a fine layer of silver or pearl chrome powder using an eyeshadow applicator.
Rub the powder gently over the nail until you get the level of shine you want.
Seal everything with a glossy topcoat.
9. Red Checkerboard Accent Nails
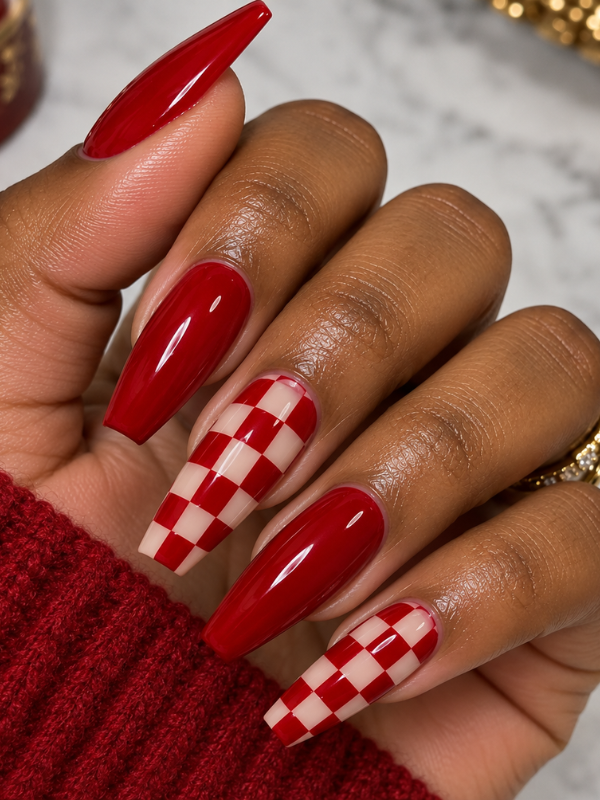
Checkerboard nail art is a fun way to break up an otherwise solid manicure.
You can keep most of your nails red and use the checkerboard pattern on just one accent nail.
How to Create the Look
Paint your main nails red.
For the accent nail, use a nude, white, or pale pink base. Once it is dry, use a fine nail-art brush to draw horizontal and vertical lines with red polish.
Fill alternate squares to create the checkerboard pattern.
Do not worry if every square is not perfectly identical. A slightly handmade appearance can make the design feel more natural.
10. Sweater Weather Textured Red Nails
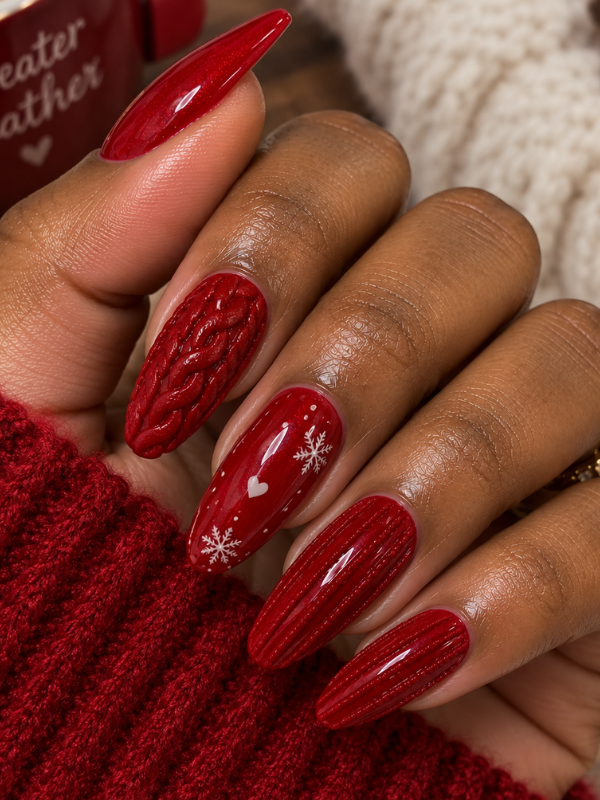
This design brings the cozy feeling of knitted sweaters to your manicure.
The textured effect looks especially good in deep red or burgundy shades and is a great choice for colder months.
How to Create the Look
Start with a deep red polish and create a matte finish.
Using a thin nail-art brush, draw simple cable-knit lines over the nail with clear, thick polish or a suitable textured nail product.
Build the design gradually instead of applying one very thick layer.
Once you are happy with the texture, allow it to set according to the product instructions.
11. Red Aura Nails
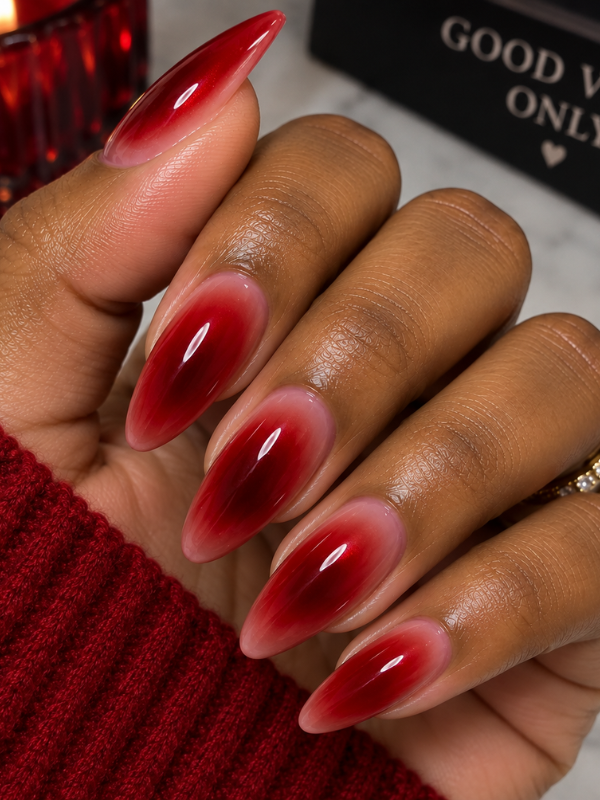
Aura nails create a soft glow in the center of the nail.
Using different shades of red gives this design a warm, dreamy appearance without requiring complicated nail art.
How to Create the Look
Apply a darker red shade as your base.
Once it has dried, place a small amount of brighter red or hot pink polish in the center of the nail.
Use a makeup sponge or small eyeshadow applicator to gently blend the color outward.
The center should remain brighter while the edges gradually fade into the darker red.
Finish with a glossy topcoat.
12. Red Cat-Eye Nails
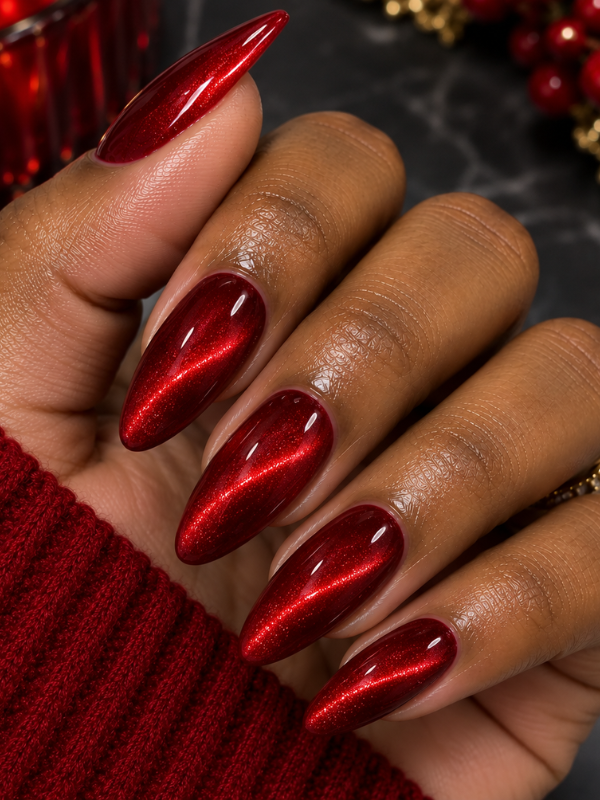
Cat-eye nails are another magnetic design that creates a dramatic reflective effect.
The shimmer appears to move when your nails catch the light, making this a great option if you want something glamorous without adding lots of decorations.
How to Create the Look
Apply your red cat-eye magnetic polish to the nail.
Before curing or allowing it to dry, hold the magnet close to the surface for around 15 seconds.
Experiment with the position of the magnet to create a diagonal, curved, or focused shimmer.
Once you are happy with the effect, cure or dry the polish according to the product instructions.
13. Red Leopard Print Nails
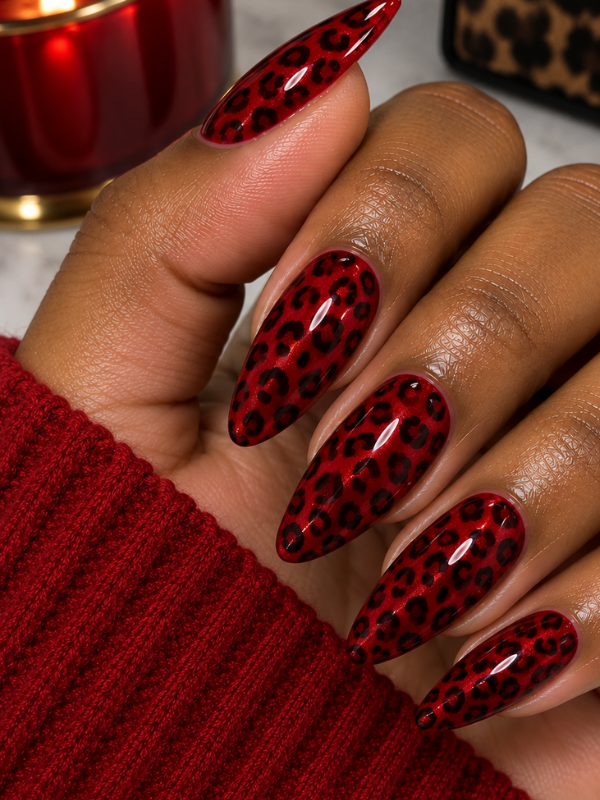
Leopard print does not have to be difficult. You can create the pattern using simple dots and small curved lines.
Red leopard nails are especially fun if you want something bold and playful.
How to Create the Look
Apply a bright red base to your nails.
Use a dotting tool to create random nude or light-pink spots.
After the spots have dried, use a smaller dotting tool or fine brush with black polish to draw broken C-shaped lines around parts of the spots.
The outlines do not need to be perfect. Random shapes actually make the leopard pattern look more realistic.
14. Heart-Shaped Glitter Red Nails
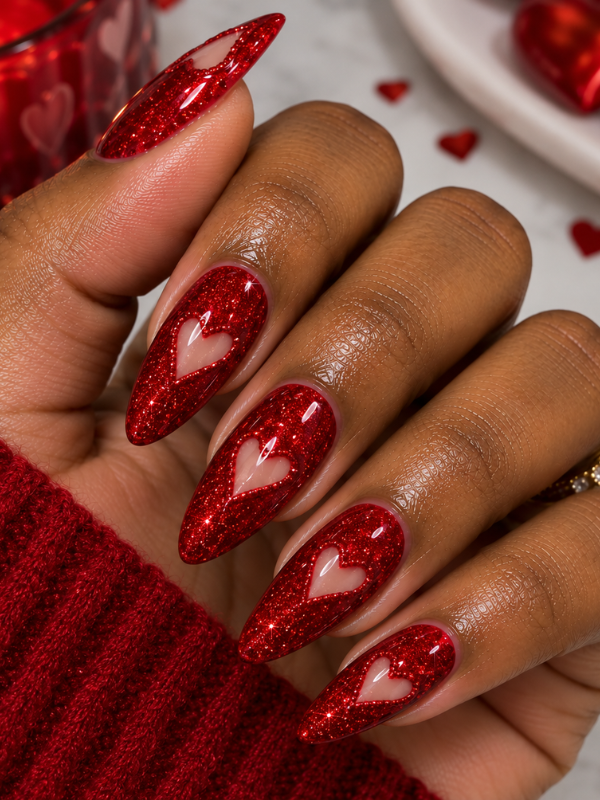
For something romantic and sparkly, add tiny heart-shaped glitter pieces to a red manicure.
This design is perfect for Valentine’s Day, date nights, parties, or anytime you want your nails to feel a little more playful.
How to Create the Look
Begin with a solid red base.
Use a small amount of clear nail adhesive or a thick topcoat to pick up individual heart-shaped glitter pieces.
Place them near the cuticle or across the nail wherever you want the sparkle.
For a more dramatic effect, concentrate several pieces near the base of the nail and gradually use fewer pieces toward the middle.
Seal the design with a topcoat.
15. Red Lipstick Nail Shape
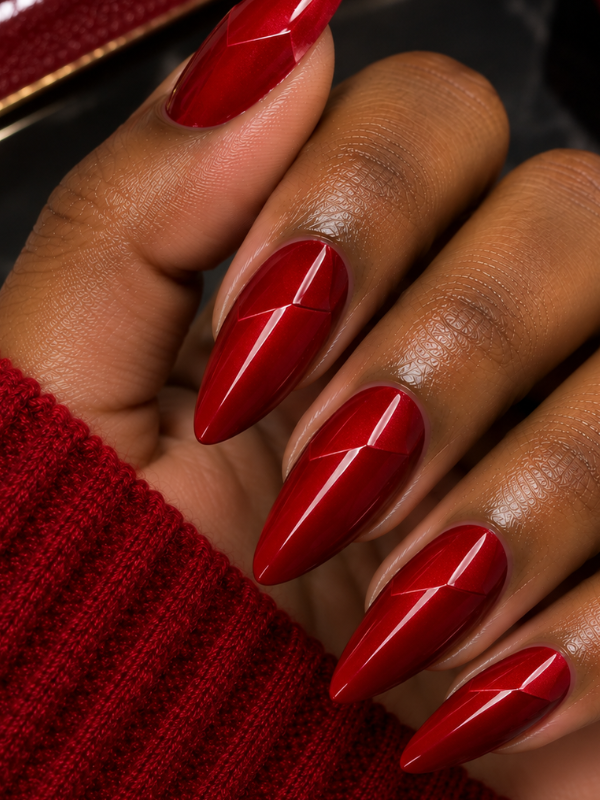
Not every nail trend is about nail art. Sometimes, the shape itself creates the statement.
The lipstick nail shape has a slanted tip that resembles the angled end of a lipstick tube. It looks particularly striking on longer nails.
How to Create the Look
Start by shaping your nails into a long square or coffin shape.
Using a nail file, carefully file one side of the tip diagonally. Take your time so you do not remove too much length.
Once you have achieved the slanted lipstick shape, apply your favorite deep red polish.
A glossy finish will make the unusual shape stand out even more.
DIY Tips for Better Red Nail Designs
Beautiful nail art starts with good preparation. Even a simple red manicure can look messy if the nail surface is uneven or polish gets onto the skin.
Use the Right Tools
You do not need a huge collection of nail-art supplies.
A few basics can make a big difference:
- Fine nail-art brush
- Dotting tools
- Nail file and buffer
- Base coat
- Glossy topcoat
- Small cleanup brush
- Acetone or nail polish remover
- Makeup sponge for ombre designs
- Tweezers for nail decorations
Do Not Skip Nail Prep
Before applying polish, gently push back your cuticles and clean the nail surface.
Lightly buff the nails if needed, then wipe them with rubbing alcohol or nail polish remover to remove excess oil.
Starting with a clean nail helps the polish apply more evenly.
Keep Your Coats Thin
One of the easiest ways to make a manicure look messy is to apply too much polish at once.
Thin coats usually dry more evenly and give you better control.
It may take an extra coat to reach your desired color, but the final result will usually look smoother.
Clean Around the Cuticles
Even experienced nail artists sometimes get polish on their skin.
Keep a small cleanup brush nearby and dip it into acetone or nail polish remover. Carefully trace around the edges of the nail to remove mistakes.
Do this before the polish fully dries and before applying your final topcoat.
Red nails never really go out of style. The color can be classic and elegant, but it can also be playful, dramatic, romantic, or edgy depending on the design you choose.
If you prefer something timeless, start with classic ruby red nails or red French tips. For a softer look, try jelly red or aura nails. And if you want your manicure to get noticed, velvet, cat-eye, leopard print, or glitter designs are worth experimenting with.
The best part is that you do not have to be a professional nail artist to try many of these looks. Start with one simple design, take your time, and give yourself permission to make a few mistakes while learning.
Grab your favorite red polish and try the style that catches your eye first. Your next manicure might turn out better than you expect.
This Post Showed You 15 Viral Red Nail Designs, Easy DIY Looks You Need
You may also like:
Pastel Blue Nails You’ll Love for a Fresh, Minimal Look
One Comment