Henna is such a beautiful way to decorate your skin, and you don’t need to be an expert artist to create something pretty. If you’re just getting started, simple henna designs are the perfect place to begin because they use basic lines, dots, flowers, leaves, and curves that are much easier to practice.
You can create a tiny design on one finger, decorate your wrist like a delicate bracelet, or gradually work your way up to a fuller hand design. The best part is that you can keep your patterns minimal while still making them look elegant and eye-catching.
If you’re looking for inspiration, here are 20 simple henna designs for beginners that are easy to practice and customize.
What Makes a Henna Design Beginner-Friendly?
A beginner-friendly henna design doesn’t need lots of complicated details. In fact, some of the prettiest designs are made from a few simple elements repeated in a thoughtful way.
Look for designs that use simple lines, dots, curves, leaves, flowers, and small geometric shapes. Designs with plenty of open space are also easier to create because you don’t have to cover every part of the skin.
If you’re completely new to henna, start small. A finger, wrist, or small section of the back of your hand gives you enough room to practice without feeling overwhelmed.
20 Simple Henna Designs for Beginners
1. Simple Floral Henna Design
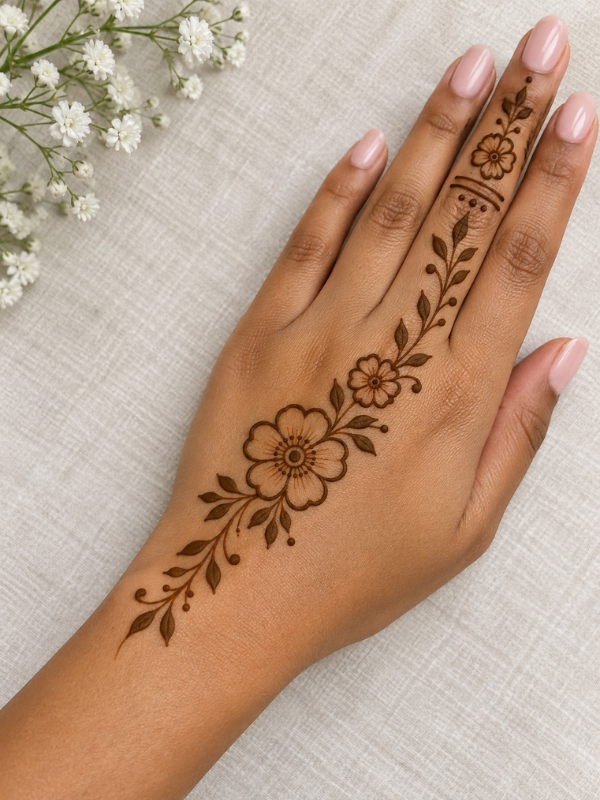
A small floral design is one of the easiest places to start. You can create a basic flower using a few rounded petals and add two or three leaves around it.
Try placing a small flower on the back of your hand and connecting it to a curved stem. You can also add tiny dots around the flower to give the design a little more detail without making it complicated.
This design works beautifully on its own, but you can also build on it as your confidence improves.
2. Minimal Henna Vine
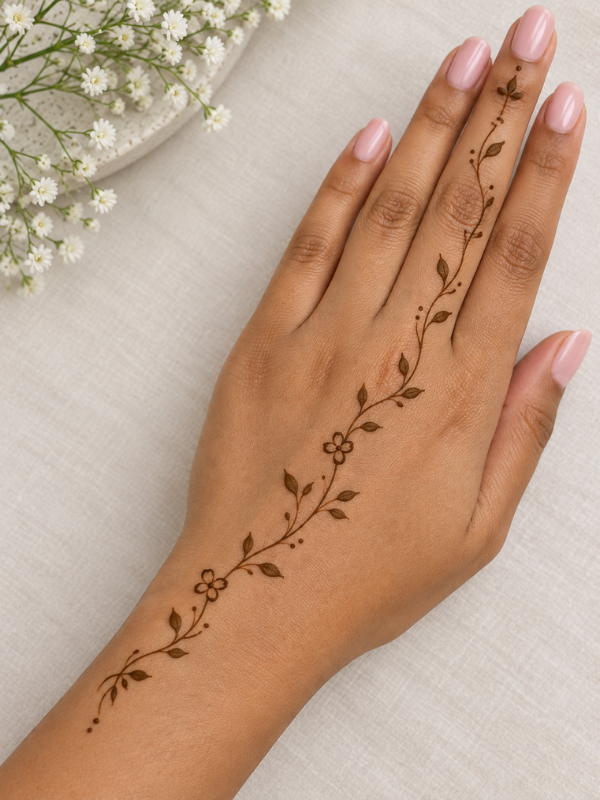
Henna vines are beginner-friendly because you don’t need to create a perfectly symmetrical pattern. Start with a long, curved line and add small leaves along one or both sides.
You can make the vine short and delicate or let it travel from your wrist toward your fingers. Leaving plenty of space between the leaves will give the design a clean and airy appearance.
This is a lovely choice if you prefer delicate henna rather than a heavily filled design.
3. Simple Henna Mandala
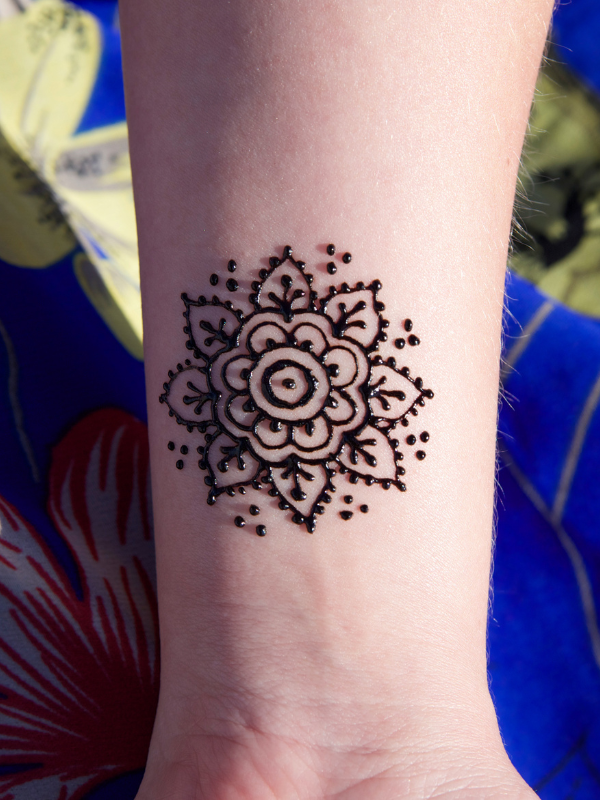
Mandala designs can look complicated, but you can create a very simple version by starting with a small circle in the center. From there, add a few petals around it and finish with dots or curved lines.
Don’t worry about making every section completely identical. For a beginner design, a slightly imperfect mandala can still look beautiful and handmade.
A small mandala in the center of the palm or back of the hand can make a simple design feel much more detailed.
4. Easy Finger Henna Design
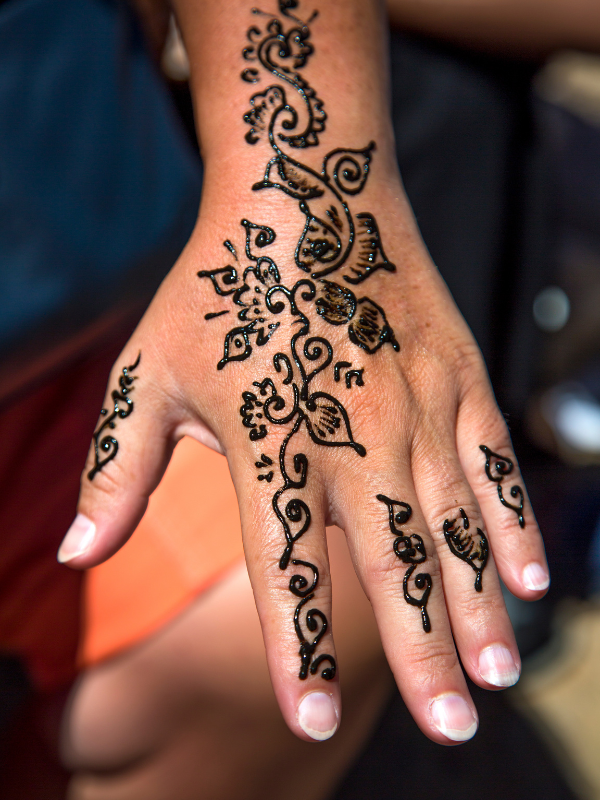
You don’t have to decorate your entire hand to enjoy henna. Finger designs are a great option when you want something small and easy to practice.
Start with a few horizontal lines across the finger, then add tiny dots, leaves, or small flowers between them. You can decorate one finger or create a slightly different pattern on several fingers.
This is also a great choice if you’re trying henna for the first time and don’t want to commit to a large design.
5. Simple Henna Bracelet Design
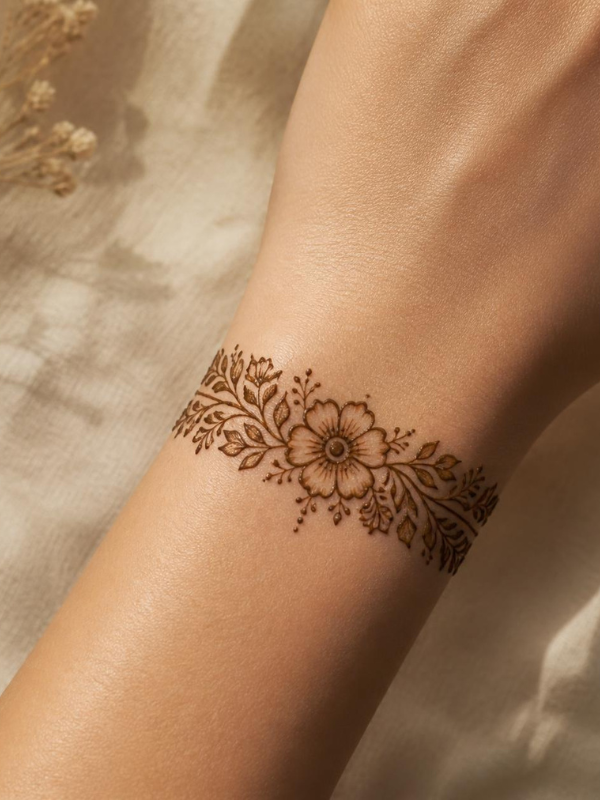
A henna bracelet creates the appearance of jewelry without actually wearing a bracelet. You can make one using two or three curved lines around your wrist and decorate them with dots, flowers, leaves, or small geometric shapes.
For an especially simple version, create a thin band with a repeating dot pattern. Once you’re comfortable, you can add a small floral motif in the center.
It’s simple, elegant, and easy to customize.
6. Minimal Back-Hand Henna Design
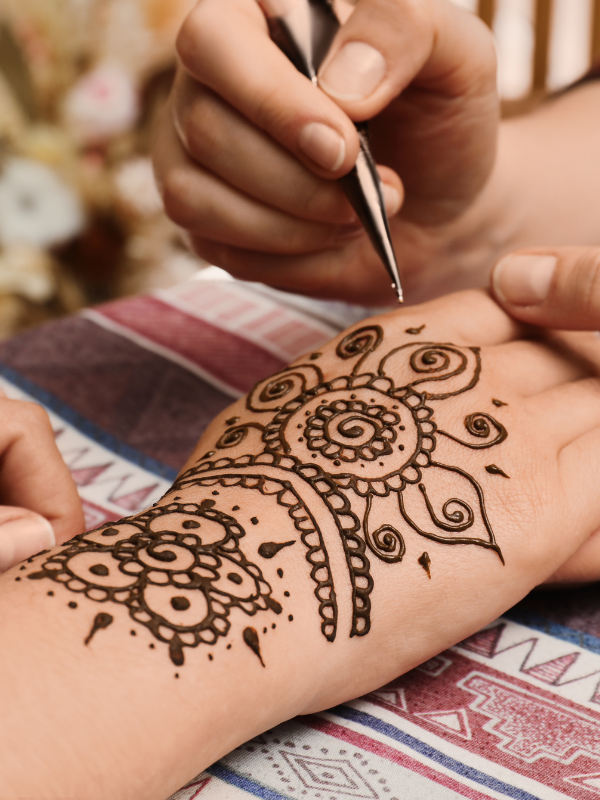
For a clean and modern look, try a small design on the back of your hand. You could place a flower, leaf, heart, or mandala in the center and surround it with a few curved lines.
The key to this style is leaving plenty of skin visible. You don’t need to fill the entire hand for the design to stand out.
This is one of the easiest ways to create a polished-looking henna design without spending a long time drawing.
7. Simple Arabic Henna Design
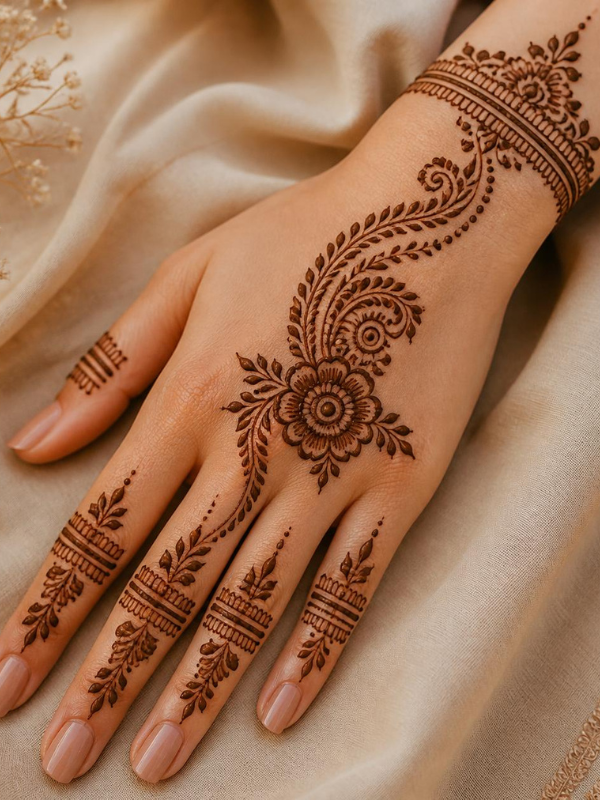
Arabic-inspired henna designs often use flowing floral patterns and plenty of open space, making simplified versions suitable for beginners.
Start at one side of your hand with a curved vine. Add leaves, small flowers, and a few dots as you move the design diagonally across the hand.
You don’t need to recreate a highly detailed traditional pattern. Keeping the elements simple can give you that beautiful flowing appearance while making the design much easier to draw.
8. Easy Henna Leaf Design
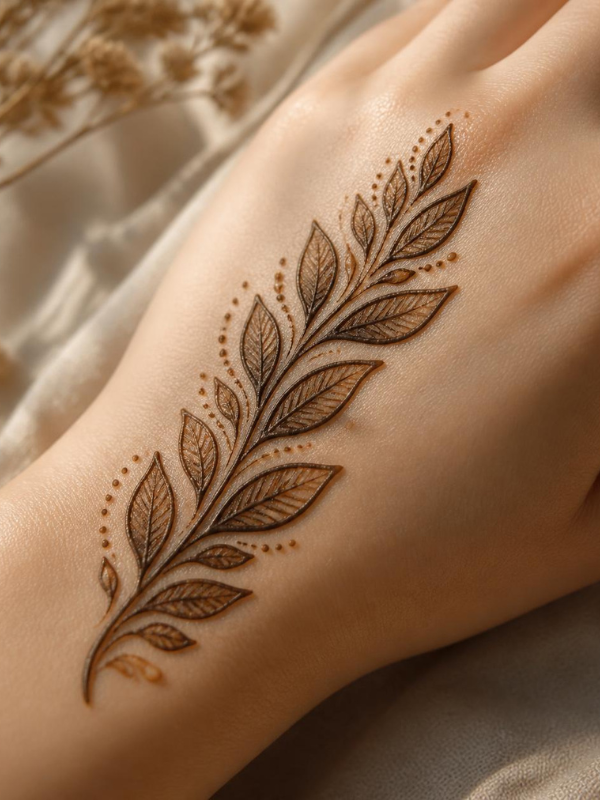
Leaves are one of the easiest henna elements to practice. Begin by drawing a simple curved stem and add small leaf shapes along it.
You can create a single leaf branch on your wrist or combine several branches to form a larger design. Try alternating the direction of the leaves to make the pattern look more natural.
Once you become comfortable with basic leaves, you can combine them with flowers, vines, and dots to create more elaborate designs.
9. Simple Henna Flower Trail
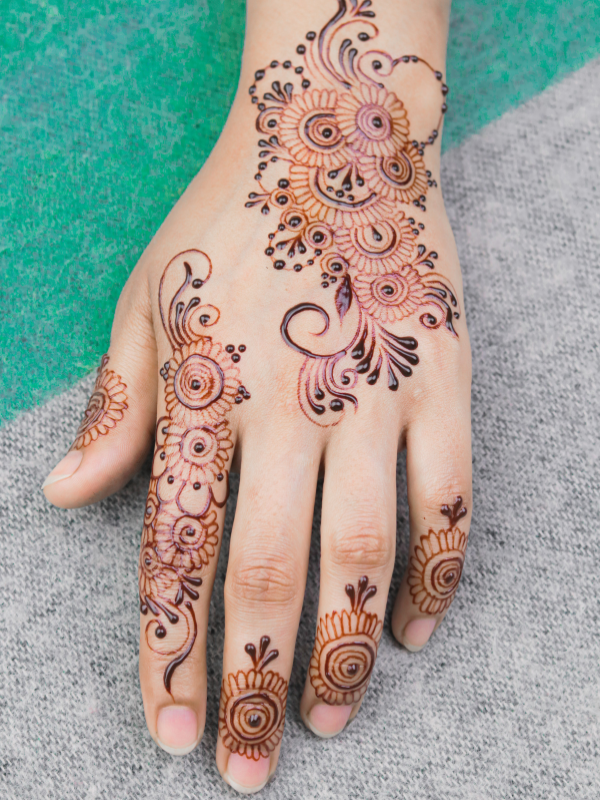
A flower trail is another easy design that looks much more detailed than it actually is. Draw a curved line and place small flowers along the line at different points.
Add tiny leaves between the flowers and a few dots around them. You can make the trail run across the back of your hand, down your wrist, or along the side of your hand.
The beauty of this design is that you can make it as short or long as you want.
10. Minimal Henna Heart Design
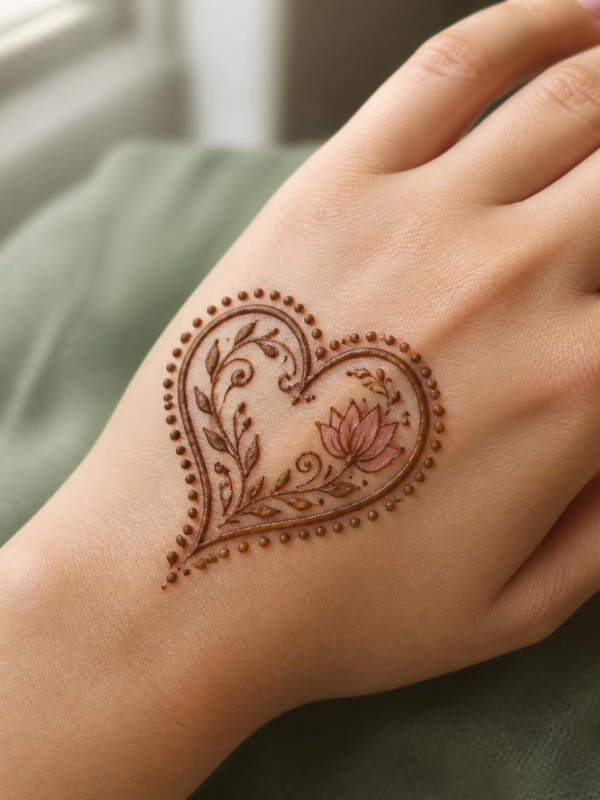
If you want something cute and simple, try a small heart design. Draw one or several tiny hearts and connect them with curved lines or little leaves.
You can also place a single heart in the center of a small floral design. Adding a few dots around it can make the pattern feel more complete.
This is a fun option for casual occasions or when you want your henna to have a playful touch.
11. Simple Peacock Feather Henna Design
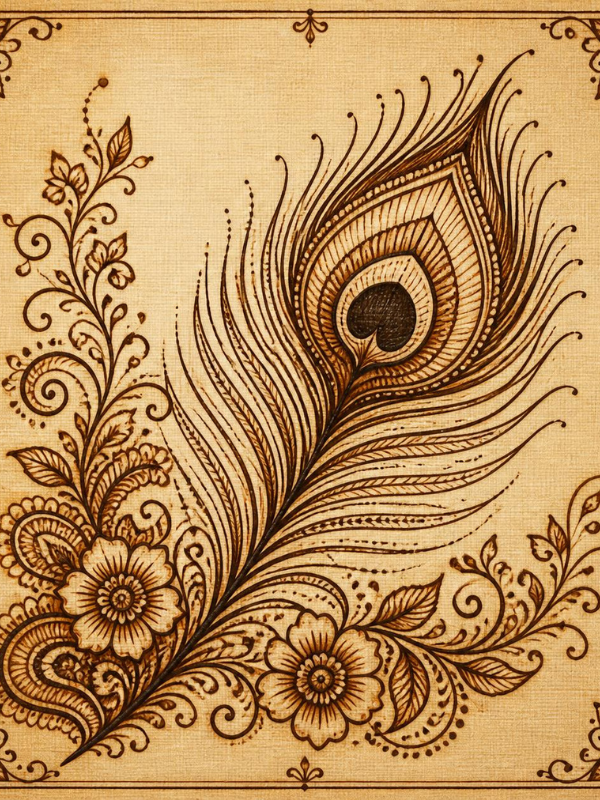
Peacock-inspired patterns can be simplified for beginners by focusing on the basic feather shape instead of trying to recreate every intricate detail.
Start with a curved feather outline and add a few small curved shapes inside it. You can finish the design with dots or tiny leaves around the base.
Keep the feather relatively small while you’re practicing. Once you’re more confident with your henna cone, you can add more layers of detail.
12. Easy Henna Dot Design
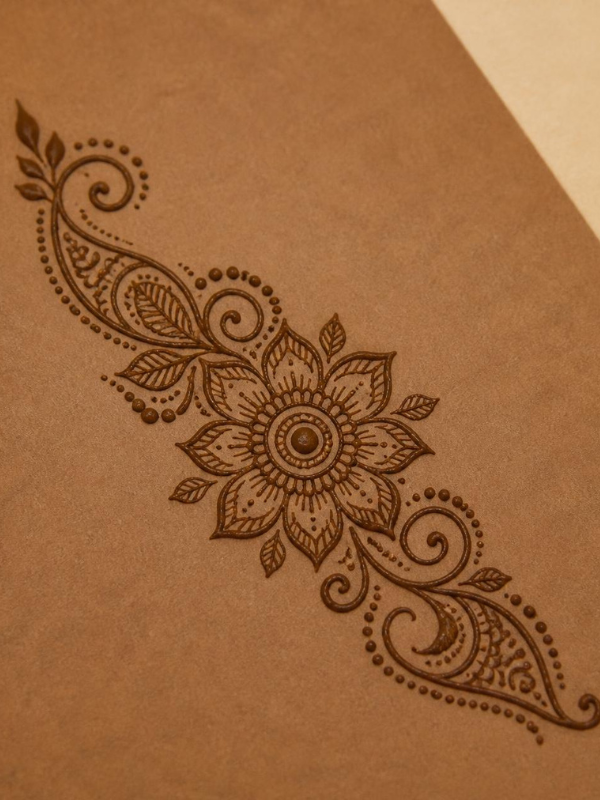
Never underestimate the power of dots. A design made almost entirely from dots can look surprisingly elegant and is one of the easiest patterns for beginners.
Try creating groups of small and large dots in a repeating pattern. You can arrange them in circles, lines, curves, or around a central flower.
Dot patterns are also useful for filling small empty spaces in other henna designs without making them look too busy.
13. Simple Geometric Henna Design
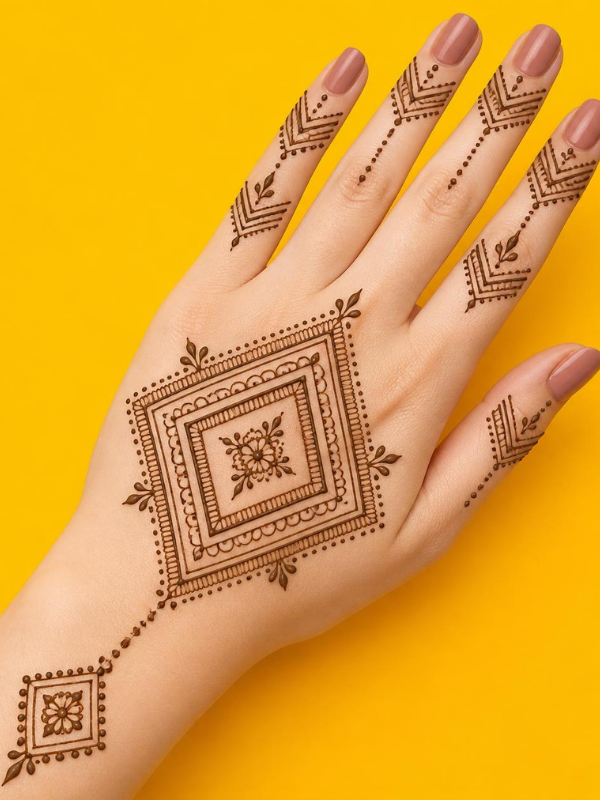
If flowers aren’t really your thing, geometric henna may be more your style. You can create beautiful patterns using circles, triangles, diamonds, squares, and straight lines.
Start with one simple shape and repeat it across the area you’re decorating. You can also combine thin lines with small dots for a modern look.
Geometric patterns are especially nice on the fingers and wrists because you can keep the design narrow and structured.
14. Simple Henna Paisley Design
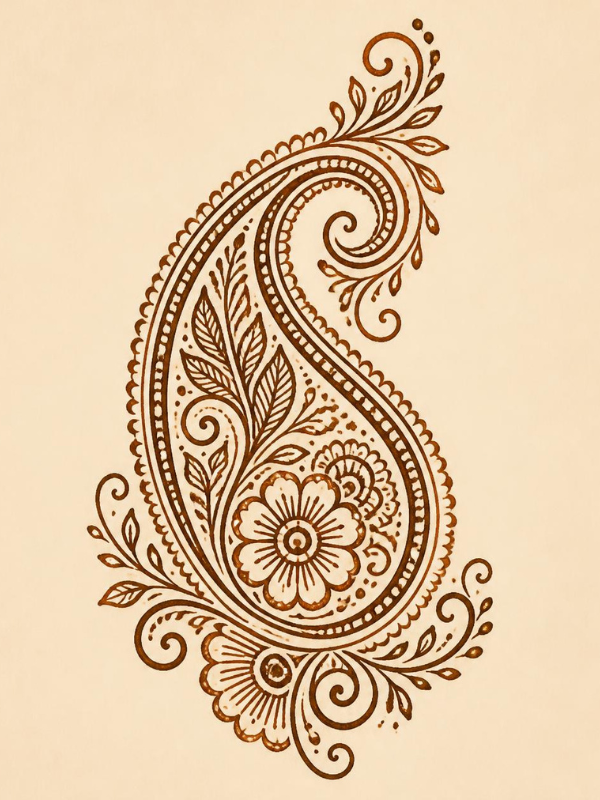
Paisley shapes are a classic part of many henna designs. While detailed paisley patterns can be challenging, a basic version is quite manageable for beginners.
Draw a curved teardrop shape and add a few simple lines, dots, or leaves inside it. You can use one large paisley as the main focus or combine several small ones.
A single paisley on the back of the hand can look beautiful without needing lots of additional details.
15. Easy Henna Wrist Design
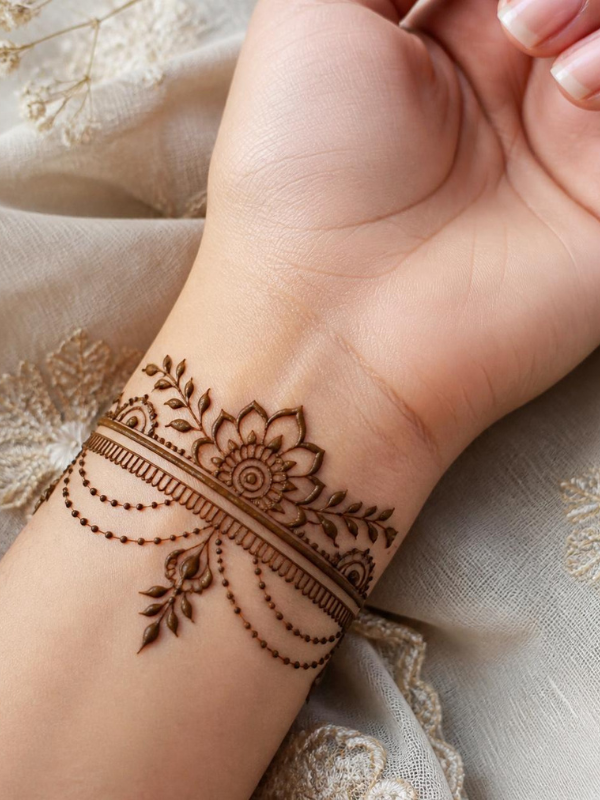
The wrist is a great place for beginners because you have a smaller area to work with. You can create a simple flower, vine, geometric band, or a few curved lines.
For a delicate look, try a thin floral vine that wraps slightly around the wrist. If you want something bolder, create a wider bracelet-style design with repeated patterns.
Keeping the design relatively small also makes it easier to control the henna cone.
16. Simple Henna Crescent Moon Design
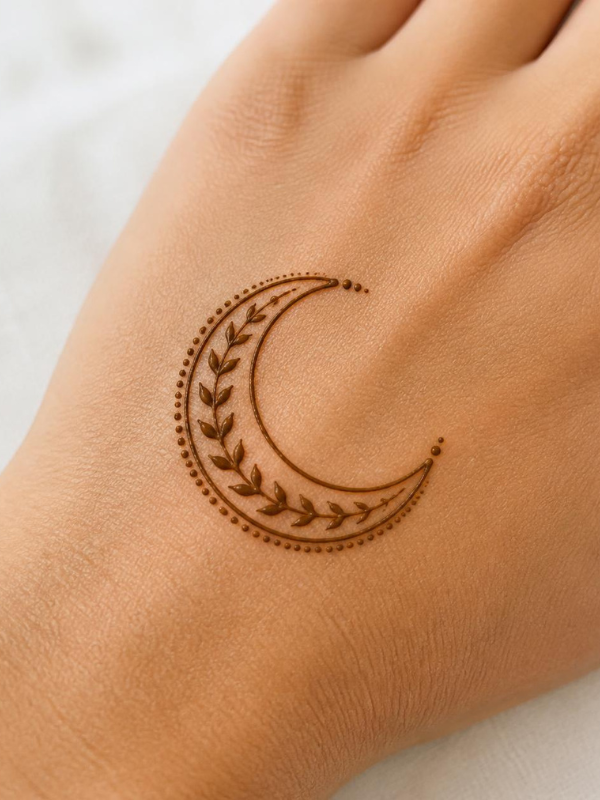
A crescent moon is an easy motif that can be used on its own or combined with tiny stars and dots.
Draw a simple crescent shape and add a few small dots around it. You can place the design on your wrist, finger, back of the hand, or even near the ankle.
For a more decorative look, add a tiny floral or leafy detail inside the crescent.
17. Simple Henna Sun Design
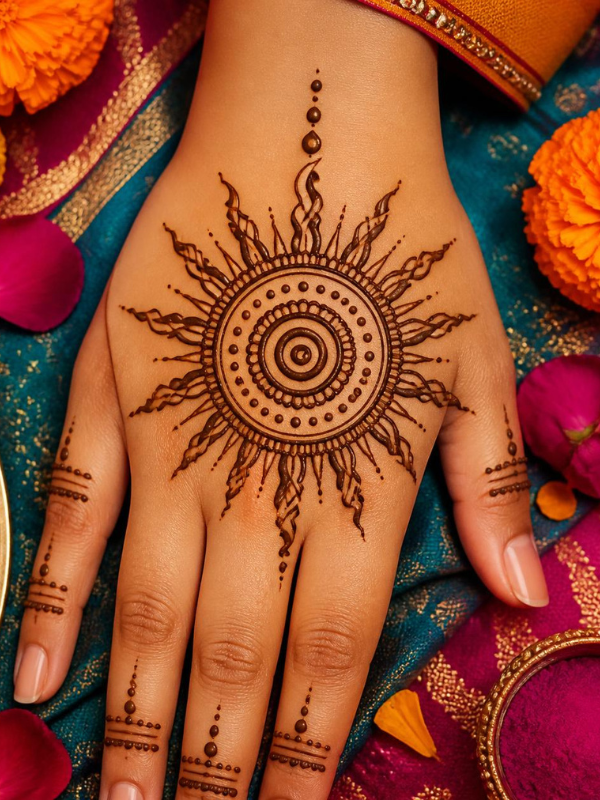
A small sun design can add a cheerful touch to your henna. Start with a small circle and draw short lines around it to create the rays.
You can add dots around the outside or combine the sun with small leaves and curved lines. Keep the rays short and simple if you’re still practicing.
A small sun works particularly well as the centerpiece of a minimal hand design.
18. Minimal Henna Half-Mandala
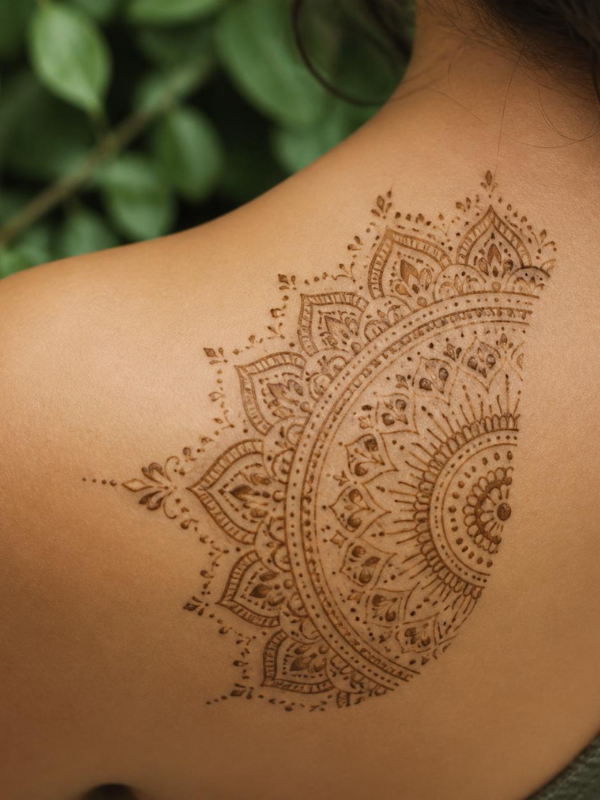
If a full mandala feels intimidating, try a half-mandala instead. Place the design along the edge of your hand or near your wrist so that only half of the circular pattern is visible.
Start with a curved line and add rows of simple petals, dots, and small curves. Because you are only creating part of the design, there’s less to draw and less pressure to make everything symmetrical.
This is a great stepping stone toward creating more detailed mandala patterns.
19. Simple Henna Floral Finger Trail
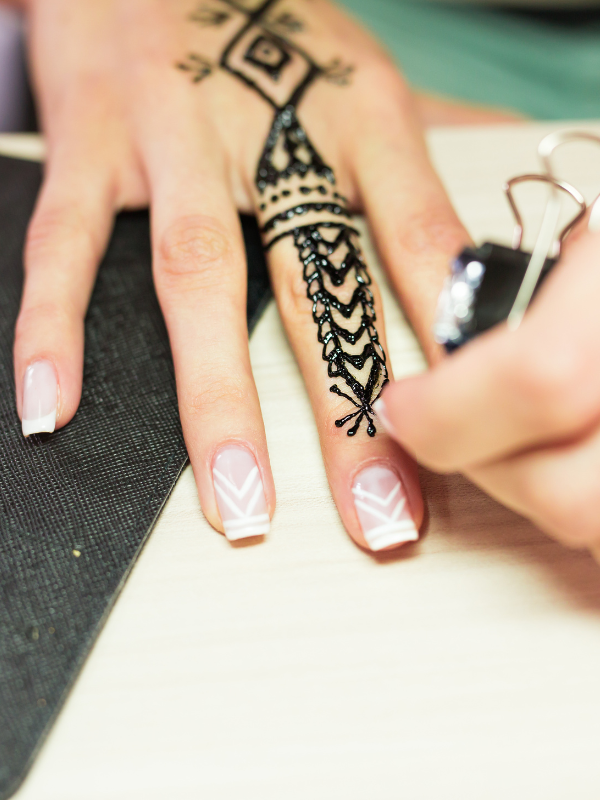
A floral finger trail combines tiny flowers, leaves, dots, and curved lines into a narrow pattern that runs along the finger.
Start with a small curved stem and add one or two flowers. Fill the remaining space with tiny leaves or dots.
Because the design is narrow, you don’t need to worry about creating large, complicated patterns. It is also easy to adjust the length depending on the size of your finger.
20. Simple Full-Hand Henna Design
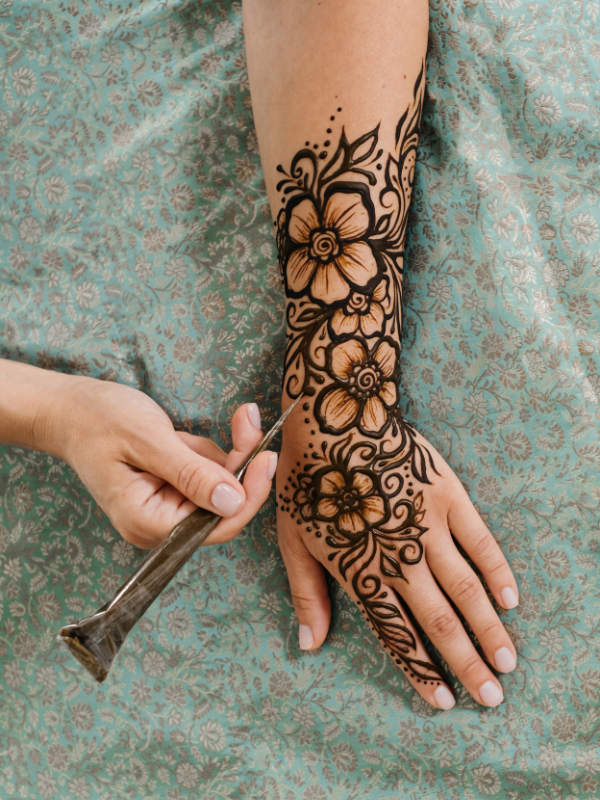
Once you’ve practiced the smaller patterns, you can combine your favorite elements into a simple full-hand design.
Start with one main element, such as a flower, mandala, or paisley. Then add vines, leaves, dots, and curved lines around it.
The trick is not to cover every inch of your hand. Leaving some open space can make the design look cleaner and allows each part of the pattern to stand out.
You don’t need dozens of complicated details to create a beautiful full-hand design. A few well-placed beginner-friendly elements can be enough.
How to Create Simple Henna Designs as a Beginner
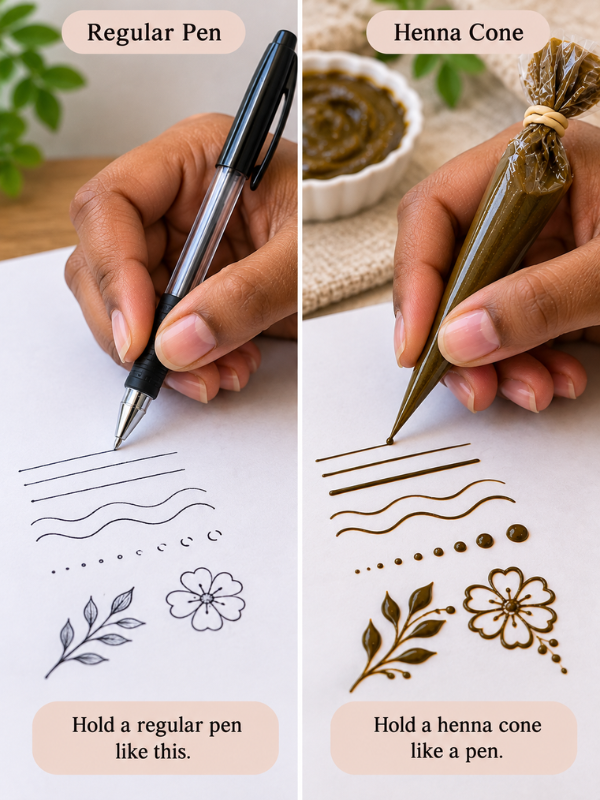
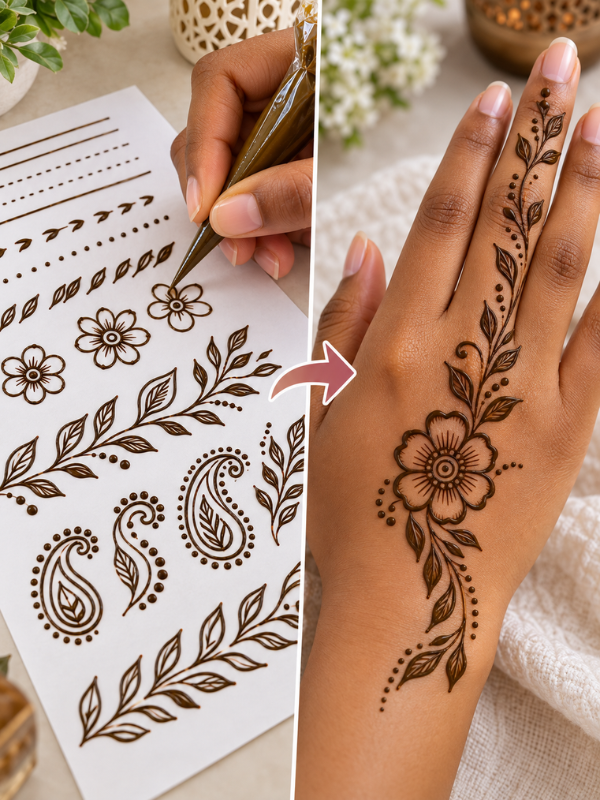
Before trying your first design on your skin, take some time to practice. Even five or ten minutes of drawing basic lines can help you become more comfortable with the henna cone.
Start with clean, dry skin and make sure there is no lotion or oily product on the area you’re decorating. Hold the cone comfortably and practice applying gentle, consistent pressure.
Begin with dots and straight lines before moving on to curves, leaves, and flowers. If your lines aren’t perfect at first, don’t worry. Your control will improve with practice.
Once you’ve finished your design, allow the henna to dry properly and follow the instructions for the particular henna product you’re using.
Easy Henna Patterns Beginners Should Practice First
Before jumping into complicated patterns, practice the basic shapes that make up most simple henna designs.
Dots: Practice making dots in different sizes by gently squeezing the cone and lifting it away from the skin.
Lines: Work on creating thin, consistent lines without changing the pressure too much.
Curves: Curved lines are useful for vines, paisleys, flowers, and many flowing henna patterns.
Leaves: Practice creating small pointed or rounded leaves along a curved stem.
Petals: Start with simple teardrop-shaped petals before trying more detailed flowers.
Circles: These are useful for mandalas, flowers, suns, and geometric patterns.
Paisley shapes: Once you can draw a curved teardrop shape, you can start experimenting with simple paisley designs.
Learning these basic elements will make it much easier to create your own designs later.
Tips for Making Your Simple Henna Designs Look Neat
One of the biggest mistakes beginners make is trying to work too quickly. Take your time and focus on controlling the amount of henna coming from the cone.
Keep your hand relaxed while you’re drawing. A tense hand can make it harder to control your movements and maintain consistent lines.
It’s also helpful to work from the larger parts of the design toward the smaller details. Draw your main flower, vine, or geometric shape first, then add dots and smaller decorations afterward.
Don’t feel like you have to fill every empty space. Negative space can actually make a henna design look more elegant and intentional.
Most importantly, don’t worry about creating a perfectly symmetrical design. Small differences are part of the handmade charm of henna.
Where to Put Simple Henna Designs
There are plenty of places where you can try a simple henna design.
Back of the hand: This gives you enough space for flowers, vines, paisleys, and small mandalas.
Palm: A small central design can look beautiful, especially when surrounded by simple dots or petals.
Fingers: Finger henna is ideal for small patterns made from lines, dots, and tiny flowers.
Wrist: This is perfect for bracelet-style patterns, vines, and small geometric designs.
Side of the hand: A floral trail or flowing vine can fit nicely along the edge.
Ankle or foot: If you want something different from hand henna, a small floral or geometric design can look lovely around the ankle or top of the foot.
When choosing your placement, consider how much space you have and how comfortable you are drawing in that area. Smaller areas can be easier when you’re still learning.
Frequently Asked Questions
How long does henna take to dry?
Henna usually needs time to dry before you touch or disturb the design. The exact drying time can vary depending on the henna paste, the design, and your environment, so follow the instructions that come with your product.
How long should I leave henna on my skin?
This depends on the type of henna you’re using and the instructions provided with it. Generally, giving the paste enough time to stain the skin properly will help you get a better result.
Can beginners make henna designs at home?
Yes. Beginners can absolutely practice henna at home. Start with simple shapes and small designs rather than attempting an intricate full-hand pattern right away.
What is the easiest henna design for beginners?
Simple flowers, leaves, dots, vines, and small geometric patterns are some of the easiest designs to practice. A small finger or wrist design can also be a good starting point.
How can I make my henna stain darker?
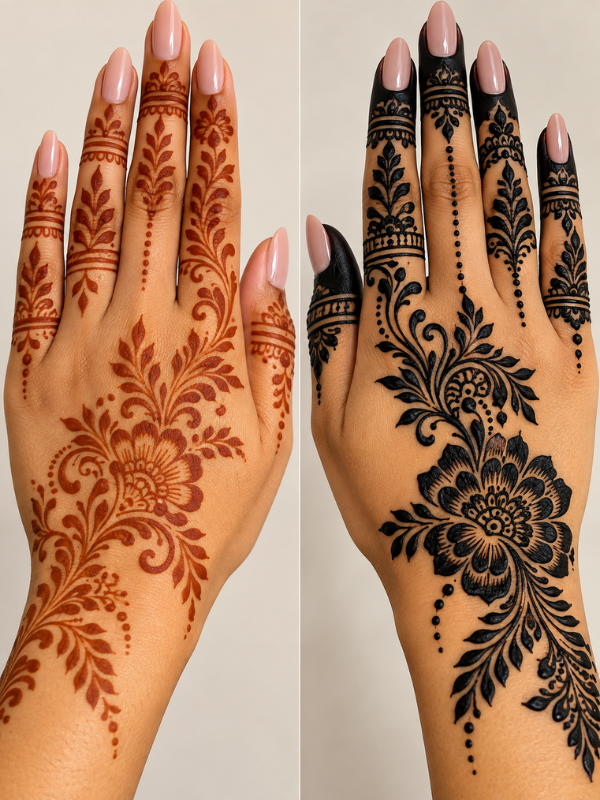
A good stain depends on several factors, including the quality of the henna, how long the paste remains on the skin, and proper aftercare. Always follow the instructions for your particular henna product rather than relying on one method for every type of paste.
How long do henna designs usually last?
Henna stains are temporary and gradually fade as the skin naturally sheds. How long the design lasts can vary depending on the location of the design, how often the area is exposed to water, and individual skin differences.
You don’t need advanced drawing skills to create beautiful henna. Starting with simple henna designs gives you the chance to become comfortable with the cone while learning the basic shapes that make up more detailed patterns.
Begin with dots, lines, flowers, leaves, and simple curves. Once those feel easier, start combining them into vines, mandalas, paisleys, and full-hand designs.
And don’t be too hard on yourself if your first few attempts aren’t perfect. Henna is something you can get better at with practice, so pick one design that catches your eye and give it a try. You may be surprised by how quickly those simple little lines turn into something beautiful.
One Comment