If you are new to henna, you have probably seen those small cones used to create beautiful designs on the hands and feet. A Henna Cone is one of the easiest tools for applying henna paste and creating detailed patterns on the skin. It helps you draw thin lines, dots, flowers, leaves, paisleys, and many other designs.
Using a henna cone may look difficult at first. However, it becomes much easier once you understand how to hold it and control the pressure. You do not need to be a professional henna artist to get started.
In this guide, I will explain what a henna cone is, what is inside it, how to use it, and some simple tips that can help you get cleaner designs.
What Is a Henna Cone?
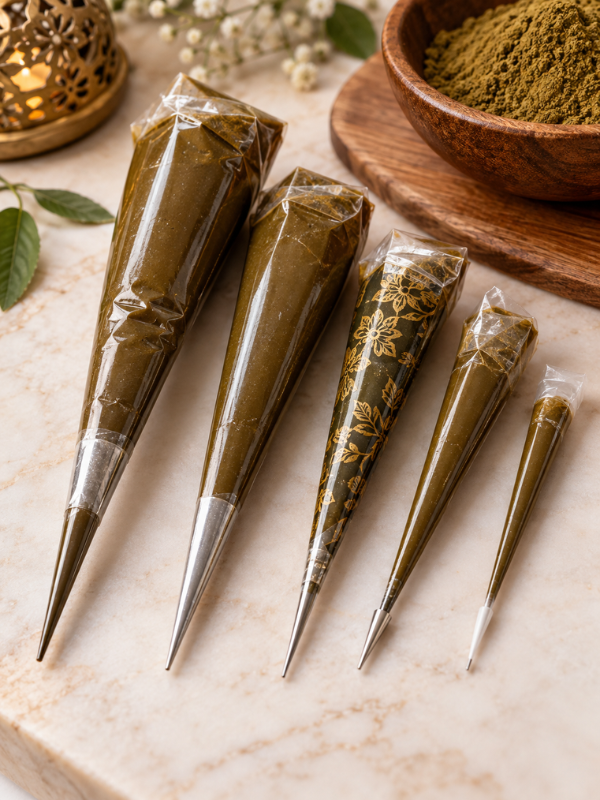
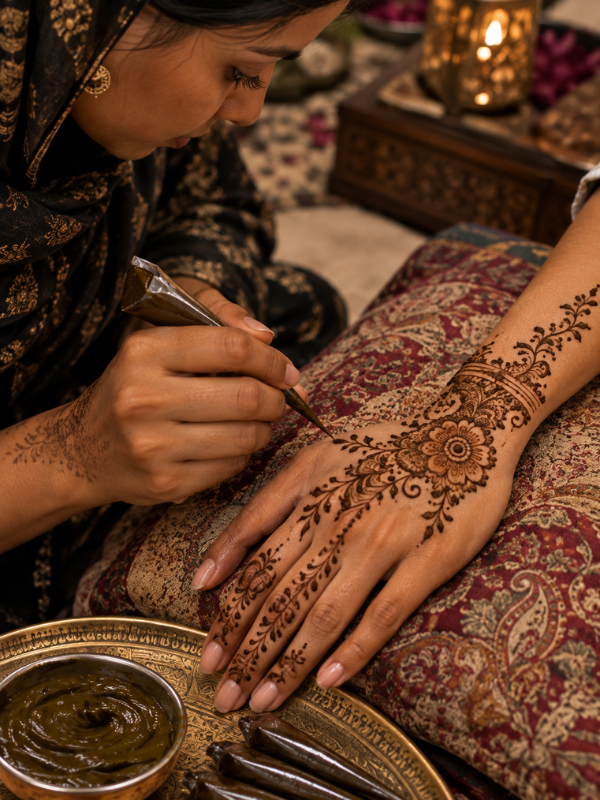
A henna cone is a small cone-shaped applicator filled with henna paste. It has a narrow opening at one end. When you gently squeeze the cone, the paste comes out through the opening.
The paste can then be used to draw designs directly on the skin.
Most henna cones are made from a thin plastic sheet that has been rolled into a cone shape. The wider end is sealed, while the narrow end is where the henna comes out.
The small tip is what makes the cone so useful. It allows you to control the amount of paste you apply.
For example, gentle pressure can create a thin line. Slightly more pressure can create a thicker line.
Henna cones are especially popular because they are simple to carry and easy to use. You can also find ready-made cones in many stores and online.
What Is Inside a Henna Cone?
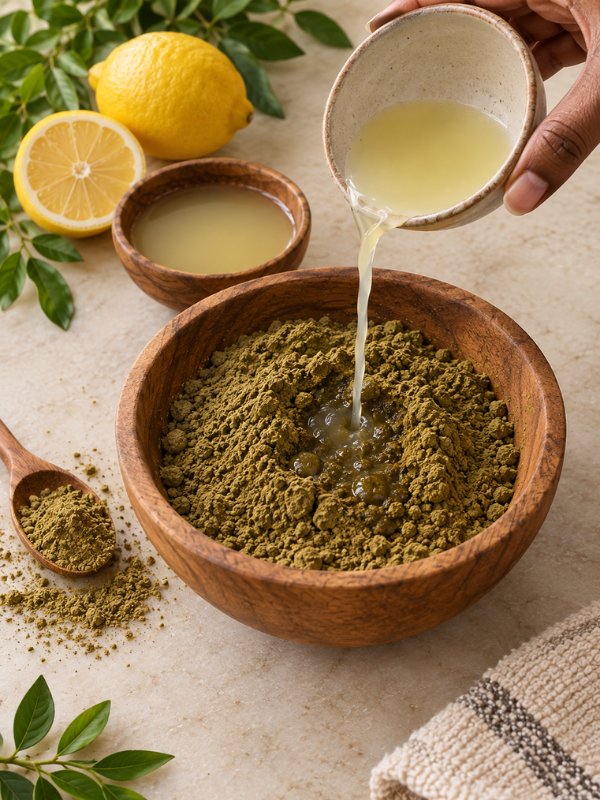
The main ingredient inside a natural henna cone is henna paste.
Natural henna paste is usually made from henna powder mixed with a liquid. Some recipes also include ingredients such as lemon juice, sugar, or essential oils.
The exact recipe can vary from one henna artist to another.
The quality of the paste matters. A good paste should have a smooth consistency. It should not be so thick that it struggles to come out. It should also not be so runny that it spreads across the skin.
If you are buying ready-made cones, check the ingredient list when possible.
This is especially important because not every product sold as henna contains only natural henna.
How Does a Henna Cone Work?
A henna cone works through simple pressure.
You squeeze the wider part of the cone with your fingers. This pushes the paste toward the narrow tip. The paste then comes out onto the skin.
The amount of pressure you use affects the thickness of the line.
Light pressure creates a thinner line. More pressure creates a thicker line.
This is why controlling your hand is so important when using a henna cone.
You do not need to squeeze constantly. Instead, use gentle, steady pressure as you move your hand.
With practice, you will start to understand how much pressure you need for different parts of a design.
How to Prepare a Henna Cone Before Using It
Before you start drawing, take a few minutes to prepare your cone.
First, check the cone for leaks. You do not want henna paste coming out from the sides while you are working.
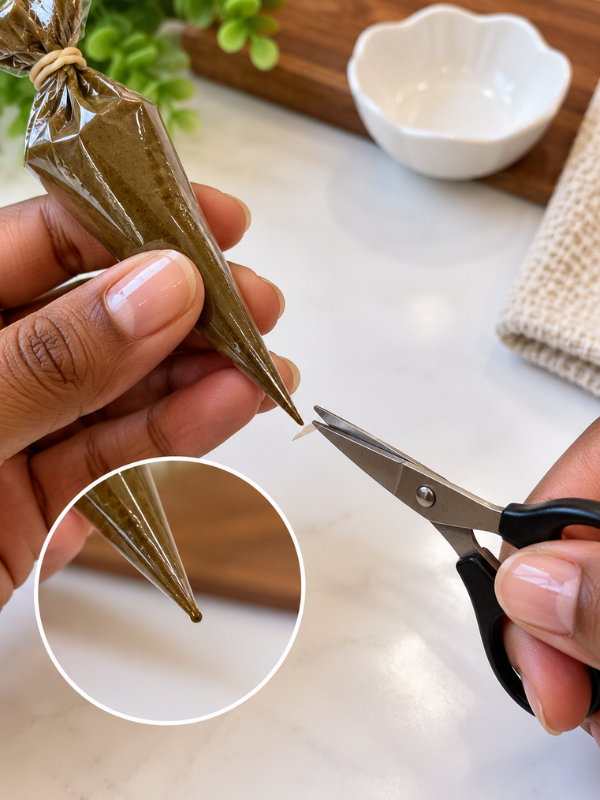
Next, check the tip. Some cones are already sealed at the end. If yours is sealed, carefully cut a tiny opening.
Start small.
You can always make the opening bigger later. However, you cannot make a large opening smaller again.
After opening the cone, gently squeeze a little paste onto a piece of paper or tissue.
This lets you check the flow.
If the paste comes out smoothly, you are ready to start.
If it feels too hard to squeeze, the paste may be too thick. If it comes out very quickly and spreads, it may be too runny.
How to Hold a Henna Cone
Holding the cone correctly can make a big difference.
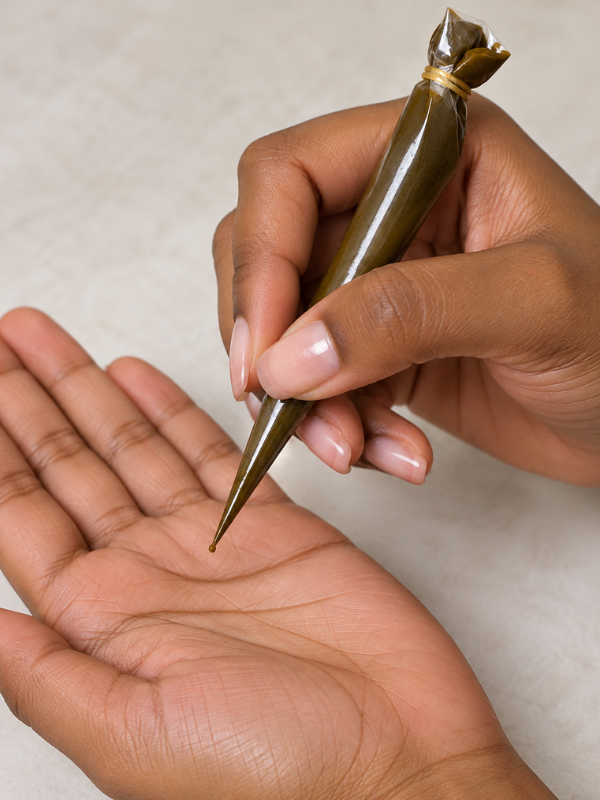
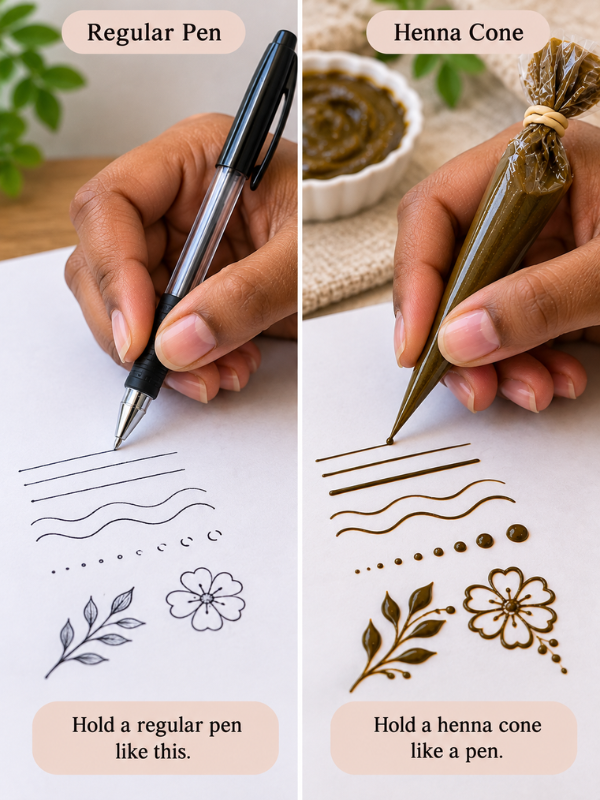
Think of it like holding a pen.
Place the cone between your thumb and fingers. Keep your grip comfortable. Do not squeeze the cone too tightly.
Keep the tip close to the skin without pushing it into the skin.
Then gently squeeze the cone while moving your hand.
Your wrist and fingers should stay relaxed.
When you are tense, your lines can become shaky. A relaxed hand gives you more control.
You can also rest part of your hand on the table or another stable surface if that feels more comfortable.
How to Use a Henna Cone Step by Step
Using a henna cone is easier when you break the process into simple steps.
1. Clean the Skin
Start with clean, dry skin.
Remove any lotion, oil, or cream from the area. These products can make it harder for the henna paste to sit properly on the skin.
Let the skin dry before you begin.
2. Test the Henna Cone
Before drawing on your hand, test the cone on a piece of paper.
Draw a few straight lines.
Then try some curves and dots.
This helps you understand how the paste flows.
3. Start With Simple Lines
Do not start with a complicated bridal design.
Begin with basic lines.
Try straight lines, curved lines, small circles, dots, and simple leaves.
These small exercises can help you get used to the pressure.
4. Create Your Design
Once you feel comfortable, start drawing your design.
Begin with the main shapes first.
Then add the smaller details.
For example, you could start with a large paisley. Then add leaves, dots, and small lines around it.
Take your time.
There is no need to rush.
5. Let the Henna Dry
Once your design is finished, allow the paste to dry.
Try not to rub or touch the design while it is still wet.
The paste needs time to stay on the skin and leave a stain.
6. Remove the Dried Paste
Once the paste is completely dry, gently scrape or flake it off.
Avoid rubbing the skin harshly.
Try to keep the area dry for a while after removing the paste.
The stain usually becomes darker over the next day or two.
How to Control Henna Cone Pressure
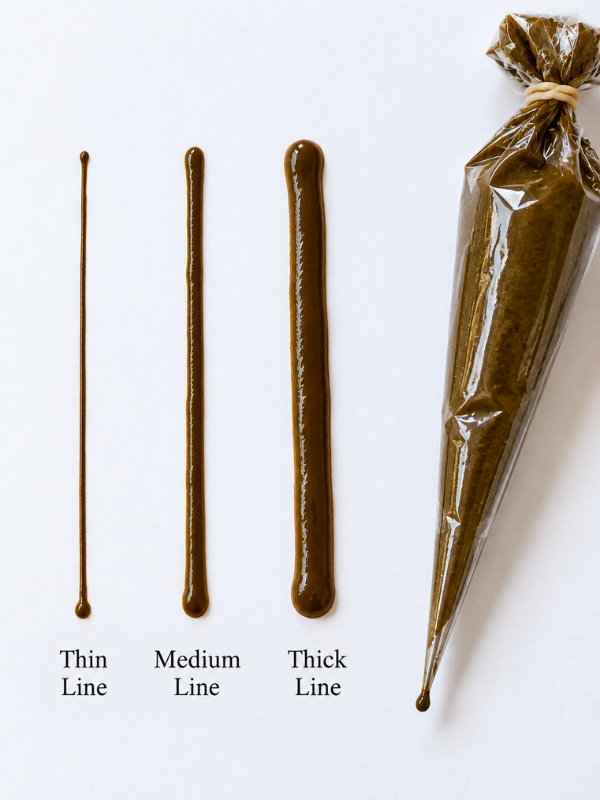
Pressure control is one of the most important skills to learn.
If you squeeze too hard, too much paste can come out. Your design may then look thick and messy.
If you barely squeeze the cone, the paste may stop flowing.
The goal is to find a comfortable middle point.
Practice making three types of lines.
Start with a very thin line.
Then make a medium line.
Finally, make a thicker line.
Pay attention to how your fingers feel as you change the pressure.
With regular practice, your hand will naturally become better at controlling the cone.
How to Make Thin Lines With a Henna Cone
Thin lines are useful for detailed henna designs.
To make a thin line, use gentle pressure.
Keep the opening small. Move the cone slowly across the skin.
Try not to press the tip directly against the skin.
Instead, hold it just above the surface.
If your line keeps breaking, you may not be applying enough pressure. If it looks too thick, reduce the pressure.
It can take a little practice to find the right balance.
How to Make Dots With a Henna Cone
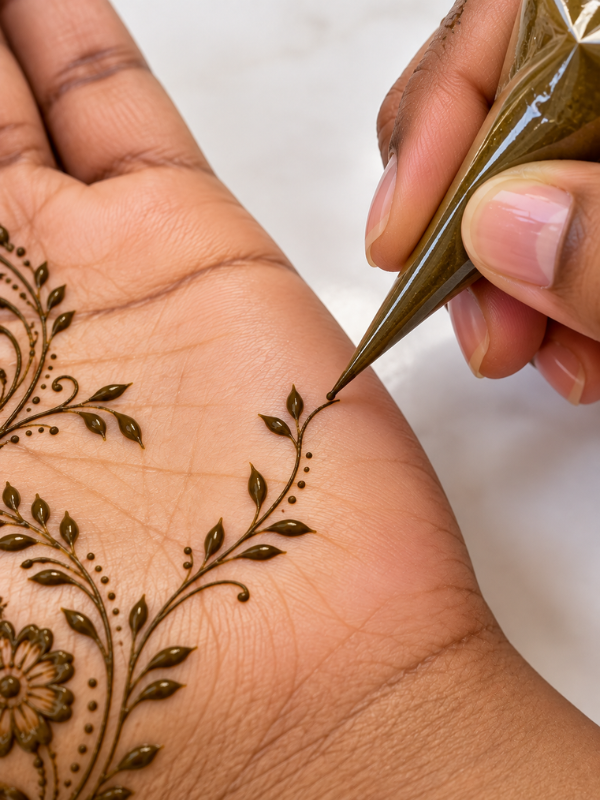
Dots are one of the easiest henna details to learn.
Place the tip close to the skin.
Gently squeeze the cone.
Allow a small amount of paste to come out.
Then stop squeezing and lift the cone.
That creates a dot.
You can make tiny dots or larger dots by changing the amount of pressure.
Dots are useful for filling empty spaces. They also look beautiful around flowers, paisleys, and mandalas.
Common Henna Cone Mistakes to Avoid
Using a henna cone is not complicated, but beginners can make a few common mistakes.
Cutting the Tip Too Large
This is one of the easiest mistakes to make.
A large opening can release too much paste at once.
Start with a very small opening instead.
Squeezing Too Hard
Too much pressure can make your lines thick.
It can also make the design difficult to control.
Use gentle pressure and adjust it as needed.
Holding the Cone Too Tightly
A tight grip can make your hand tired.
It can also make your movements less smooth.
Keep your fingers relaxed.
Drawing Too Quickly
There is no prize for finishing your henna design first.
Take your time.
Slow and controlled movements usually produce cleaner lines.
Applying Henna to Oily Skin
Oil and lotion can affect how the paste sits on the skin.
Clean the area first and let it dry before applying your design.
Touching Wet Henna
Wet henna can smear very easily.
Give your design enough time to dry before touching it.
How to Practice Using a Henna Cone
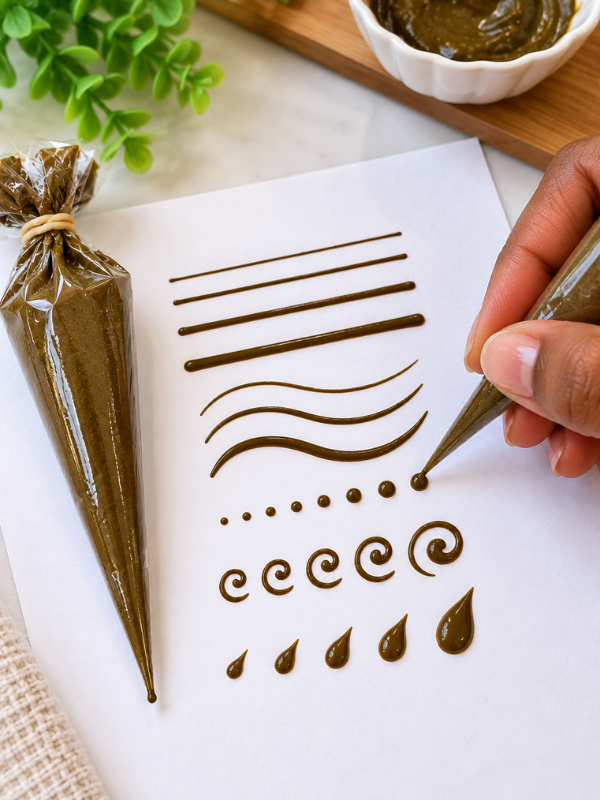
Practice is the best way to become comfortable with a henna cone.
You do not have to start on your skin.
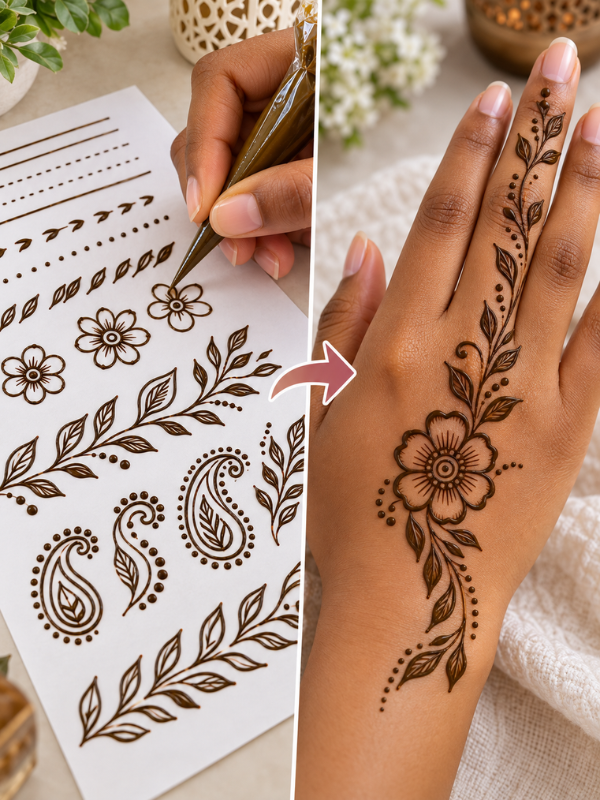
In fact, practicing on paper can be much easier.
Draw straight lines first.
Then practice curves.
After that, try simple flowers, leaves, paisleys, and dots.
You can also create small patterns by combining these basic shapes.
Once you feel more confident, you can start practicing simple designs on the skin.
Do not worry if your first designs are not perfect.
Your lines will become more controlled as you practice.
How to Store a Henna Cone
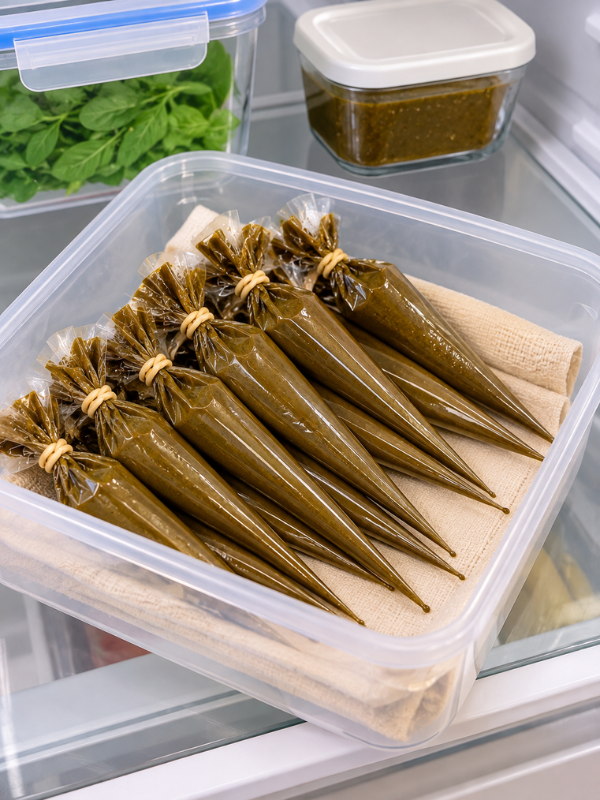
Proper storage can help protect the quality of your henna paste.
If you are using fresh natural henna cones, follow the storage instructions provided by the person or company that made them.
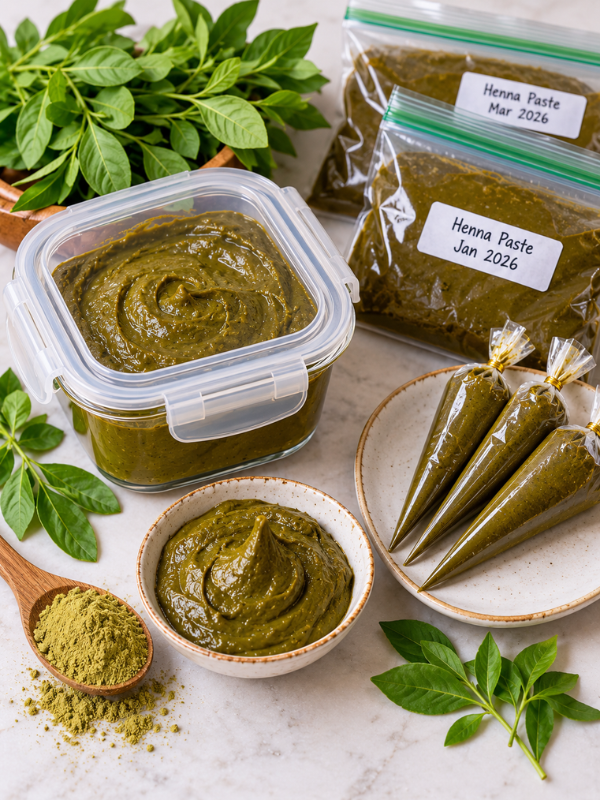
Natural henna paste is often stored in a cool place for short-term use and refrigerated or frozen for longer storage.
Keep unused cones away from direct sunlight and excessive heat.
Heat can affect the quality of natural henna paste.
If you are using a commercial product, check the package for its storage instructions.
How Long Does a Henna Cone Last?
The shelf life of a henna cone depends on what is inside it and how it has been stored.
Fresh natural henna paste generally has a shorter usable life than some commercial products.
Storage temperature also matters.
A cone that has been kept properly may last longer than one that has been left in a hot place.
Before using an older cone, check the paste carefully.
If the texture, smell, or appearance seems unusual, it is better not to use it.
Natural Henna Cone vs Ready-Made Henna Cone
There are different ways to get a henna cone.
Some people make their own paste and fill their own cones.
Others prefer ready-made cones.
Making your own cone gives you more control over the ingredients and paste consistency. However, it can take more time.
Ready-made cones are more convenient.
They are especially useful for beginners who want to start practicing without making henna paste from scratch.
Whichever option you choose, pay attention to the ingredients and quality of the product.
Is a Henna Cone Easy for Beginners?
Yes, a henna cone can be very beginner-friendly.
The hardest part is usually learning how to control the pressure.
Once you understand how much pressure to use, drawing becomes much easier.
Start with simple designs.
Practice lines and dots before moving on to detailed patterns.
You can also practice one design several times until your hand becomes more comfortable.
Remember, you do not need perfect lines on your first try.
Henna is a skill.
Like any other skill, it improves with practice.
Henna Cone Safety Tips
Safety should always come first when using henna.
If you are buying henna cones, look for products with clear ingredient information.
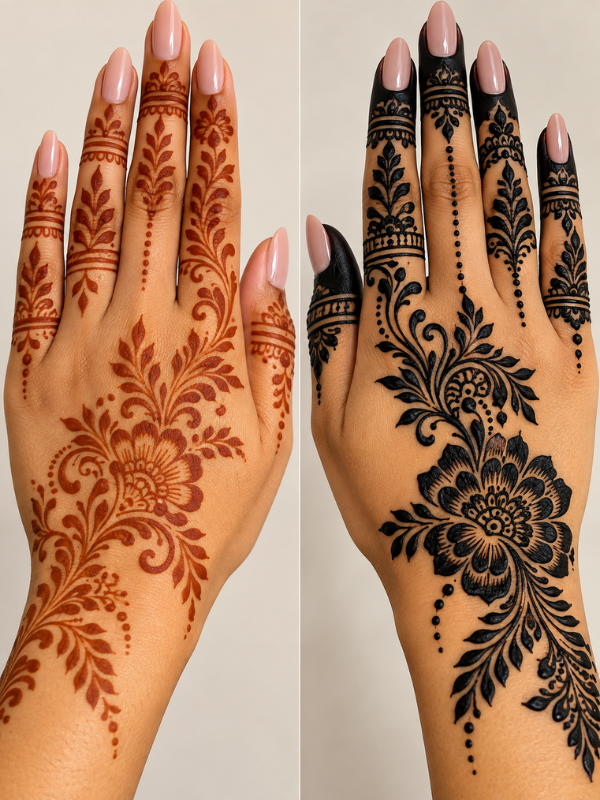
Be especially careful with products marketed as black henna. Some black henna products can contain paraphenylenediamine, also known as PPD. This chemical can cause serious skin reactions.
Natural henna is typically orange, reddish-brown, or brown as it develops on the skin. A product that promises an instant, very dark black stain deserves extra caution.
Avoid applying henna to broken, irritated, or damaged skin.
If you have sensitive skin or are unsure about a product, consider doing a small skin test first and follow the product’s safety instructions.
Most importantly, know what you are putting on your skin.
Frequently Asked Questions About Henna Cones
What is a henna cone used for?
A henna cone is used to apply henna paste to the skin. It allows you to create lines, dots, flowers, leaves, paisleys, mandalas, and other decorative designs.
How do you open a henna cone?
If the tip is sealed, carefully cut a very small opening at the pointed end. Start small because you can always make the opening larger if needed.
How do you hold a henna cone?
Hold it similarly to a pen. Keep your grip relaxed and use gentle pressure with your fingers to control the flow of the paste.
How do you make thin lines with a henna cone?
Use a small opening and gentle pressure. Move the cone slowly and steadily across the skin.
How long does a henna cone last?
It depends on the type of henna paste and how it is stored. Fresh natural henna usually has a shorter shelf life than some commercial products.
Can beginners use henna cones?
Yes. Henna cones are one of the easiest ways for beginners to start practicing henna art. Start with simple lines, dots, and basic shapes.
How should you store a henna cone?
Follow the storage instructions for the specific product. Fresh natural henna cones are commonly kept cool and may be refrigerated or frozen for longer storage.
Can you reuse a henna cone?
You may be able to use a cone again if there is paste left and it has been stored properly. However, the cone and paste should still be in good condition before reuse.
What is the difference between natural henna and black henna?
Natural henna usually produces an orange to reddish-brown or brown stain that develops over time. Some products sold as black henna may contain PPD, which can cause serious skin reactions.
Summary
A Henna Cone is a simple tool, but it can create some beautiful designs.
You do not need to be an experienced henna artist to start using one. Begin with basic lines, dots, flowers, and leaves. Then slowly move on to more detailed patterns.
The most important thing is to practice your pressure and keep your hand relaxed.
Also, always pay attention to the ingredients in the henna you use. Natural henna and products sold as black henna are not the same.
With a little patience and practice, using a henna cone can become much easier. And honestly, once you get comfortable with it, creating your own henna designs can be really fun.
This Post Showed You What Is a Henna Cone and How To Use It
You may also like:
15 Essential Henna Tools for Beginners
What Is Henna? A Beginner’s Guide to Henna Art